Figure Sketching from Life
This is your unique chance to get unlimited personal tutoring at a tiny fraction of what it really costs.
Don't miss your once-in-a-lifetime opportunity
Enroll in the Life Drawing Academy now!
Figure Sketching from Life
By Alexander Ryzhkin
In this video lesson, we will talk about Figure Sketching from life. So, let's say that we have more time for a live pose, and we can do a longer sketch. In such a case, we can study a figure in more detail and spend more time on fine-tuning shapes and volumes. This method of drawing requires more time, and you can decide when and how to use it.
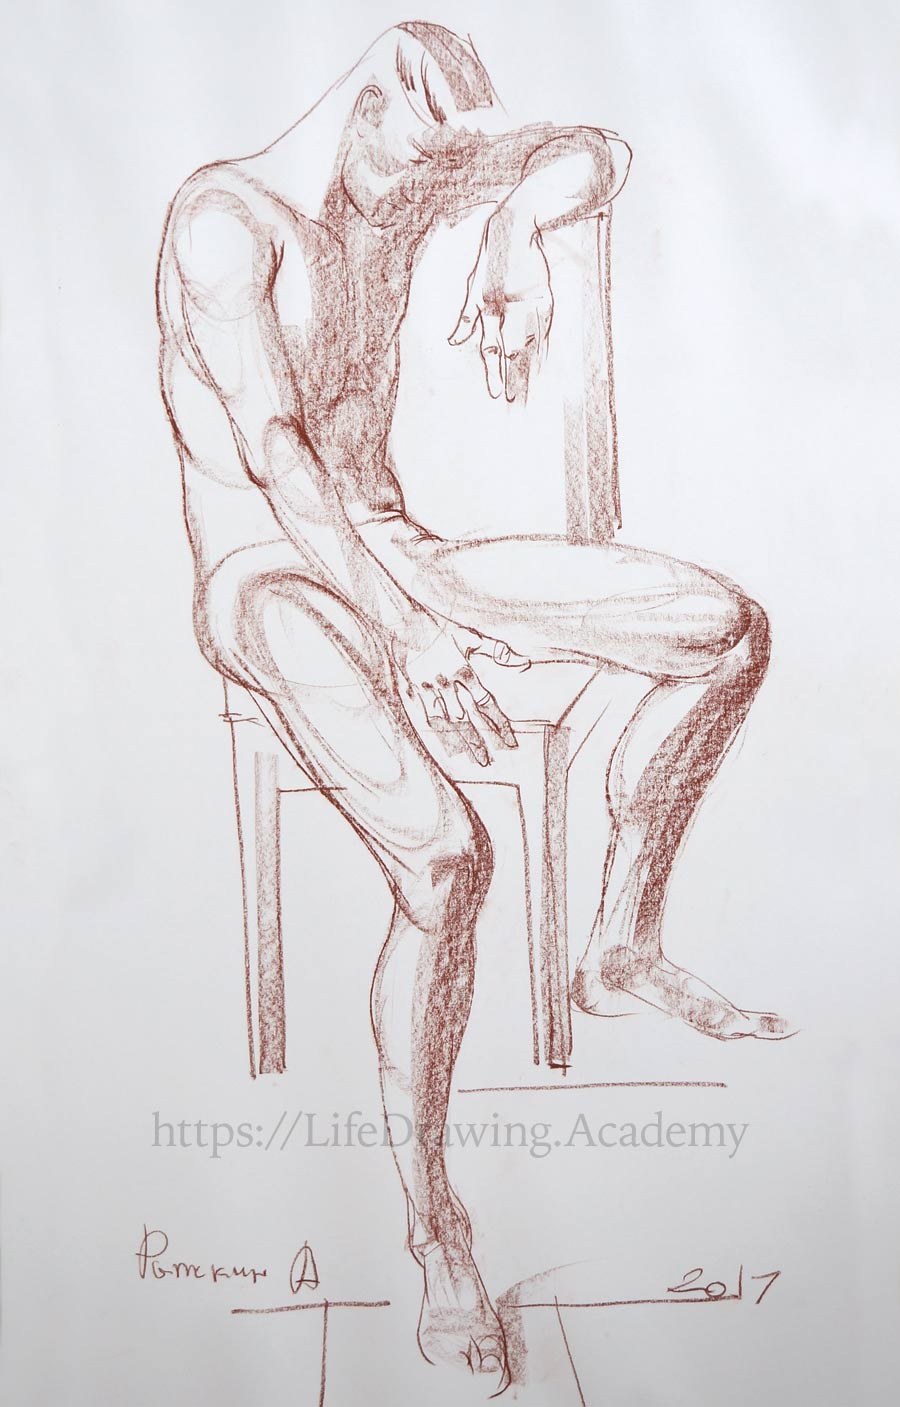
There is one way of drawing in which two-dimensional shapes in drawing represent three-dimensional masses and volumes. Here, I'm marking the deltoid muscle as a complete volume rather than an outline. Then, I do a volume of the triceps. The same approach is used for depicting the mass of the biceps. The whole mass of the upper arm consists of interlocking volumes of various muscles. This is only possible when you know the anatomy and geometry of the main muscles of a human body. Every line in such a sketch describes anatomical features of the figure. Outlines you see on paper are sub-products rather than primary elements of drawing. I'm applying stronger pressure on the drawing chalk in places where two forms intersect each other. Such sequential depiction of volumes is a more difficult way of drawing and requires more time and attention. That is why we use it when we do not have the time pressure of short poses. Also, as we start from one part of the body, the arm in our case, I have to keep in mind the overall proportion of the whole figure so it will be proportionate and balanced on this sheet of paper. Such an approach is good for an artist who already has strong drawing skills and can judge future sizes well.
The torso consists of many masses, but at the same time it is one combined volume, so I draw it as one object, "building" its united shape. This way of drawing might look similar to what I did in previous lessons, but it is based on a very different concept—depicting the volumes of a body, one by one. The way of thinking in this case is very different. Here, it is very important to use the knowledge of anatomy and proportions. In a way, I draw the volumes of every individual muscle group that influences the appearance of a body. Together, such groups construct a human figure. For example, the volume of the quadriceps interlocks with the contour of the tailor's muscle, and the adductors of the leg add additional volume to that group. I do not draw outlines on purpose here; they come out as a result of depicting the volumes of muscle groups.
Every individual volume is a complete unit that has all lines curving inward, encompassing the shape. The directions of muscles' contours point to places of their origin and insertion. Every muscle has a convex shape. Any concave place you see here is just an area between two different muscles. Although I draw a figure bit by bit, in my head there is a complete picture of the whole drawing with final proportions and dimensions. There is no risk of running out of paper here. Such an approach is suitable for a professional fine artist. If your life drawing skills are not yet well developed, I would suggest starting figure sketching by marking the overall proportions of the whole figure first. This way, you can make sure the drawing will come out well-balanced and will fit the paper size as you plan it. Once again, I draw this leg as a series of anatomical sketches of main muscles that shape the leg. It is not about outlining its overall shape, but "building" volumes of every muscle that plays its role here. Even though I have not marked the size of the head yet, I know that this foot will be slightly bigger the head's height.
When drawing a foot, I use the rule of three ovals that encompass the ankle, the middle part of the foot, and the toes. The outline of the foot just unites these three ovals in one unit. Drawing individual toes at this step is optional. When it comes to the hand, I know that its length will be the same as the height of the face. Even though the face is not there yet, I already have its dimension in my head. Such feeling for sizes and proportions comes only with practice.
When drawing a head after the figure is in place, you need to know how it connects to the neck and how the neck connects to the shoulders. One of the key dimensions you need to keep in mind is the distance from the pit of the neck to the bottom of the ear. The height of the ear is the same as the height of the nose. The eye-line divides the head exactly in half. I do not have the task of making high likeness in this portrait, so facial features are only suggested. The model's left forearm is foreshortened in perspective and therefore it is better to use cross-contours instead of outlines. Building volumes innately gives some tonal values to shapes in drawing. Tones here are just a sub-product, they are not purposely drawn.
Here's one tip for life drawing: The artwork will look complete as soon as you portray some fingers and toes. Such small details give a touch of attention to the artwork. Although the chair and the platform are secondary, giving some support to the figure anchors it to the ground. This drawing can be continued for much longer, but I think the purpose of this lesson is achieved as I have shown you the approach to portraying a figure by drawing volumes of prominent masses and muscles. Tonal rendering can be developed by making accents on borders between lights and shadows. Tonal values should reveal volumes in this drawing. They can also unite separate volumes into one figure. The drawing approach I demonstrate in this lesson is not a fast gesture sketch, but also not a long study, which can take anything up to 20 or even 40 hours...
[ The full lesson is avaibale to Life Drawing Academy members ]
This is your unique chance to get a lifetime academy membership and a dedicated team of art teachers.
Such unlimited personal tutoring is not available anywhere else.
Enroll in the Life Drawing Academy now!


