Girl Drawing Easy
This is your unique chance to get unlimited personal tutoring at a tiny fraction of what it really costs.
Don't miss your once-in-a-lifetime opportunity
Enroll in the Life Drawing Academy now!
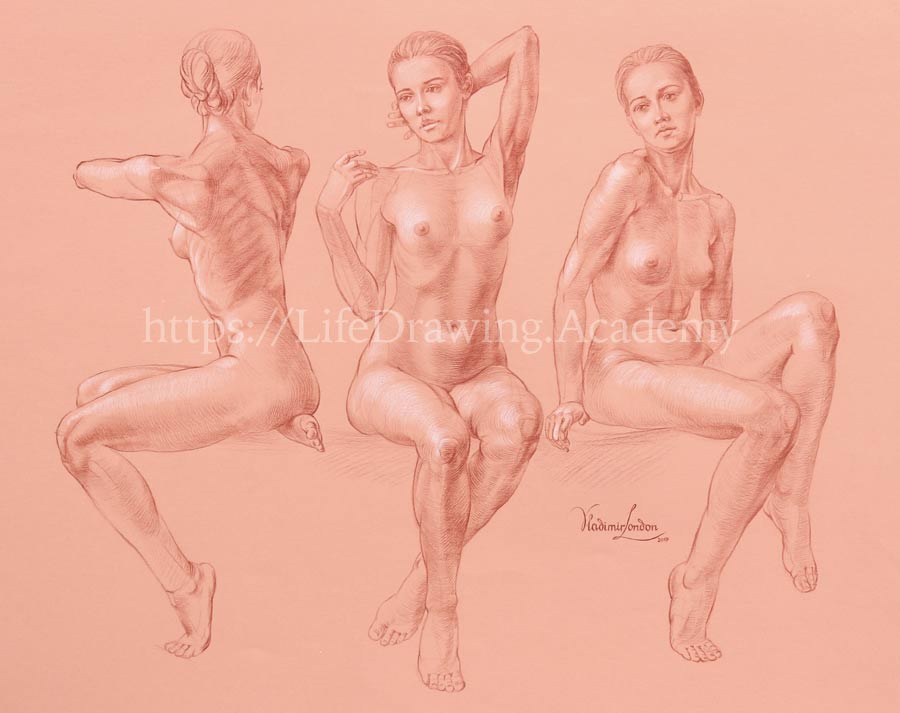
Three Ways of Life Drawing
Life Drawing by Vladimir London
Part 3 – Masses
How to Draw a Girl Easy - In this video lesson, you will discover how to draw from life by depicting the masses or volumes of a figure.
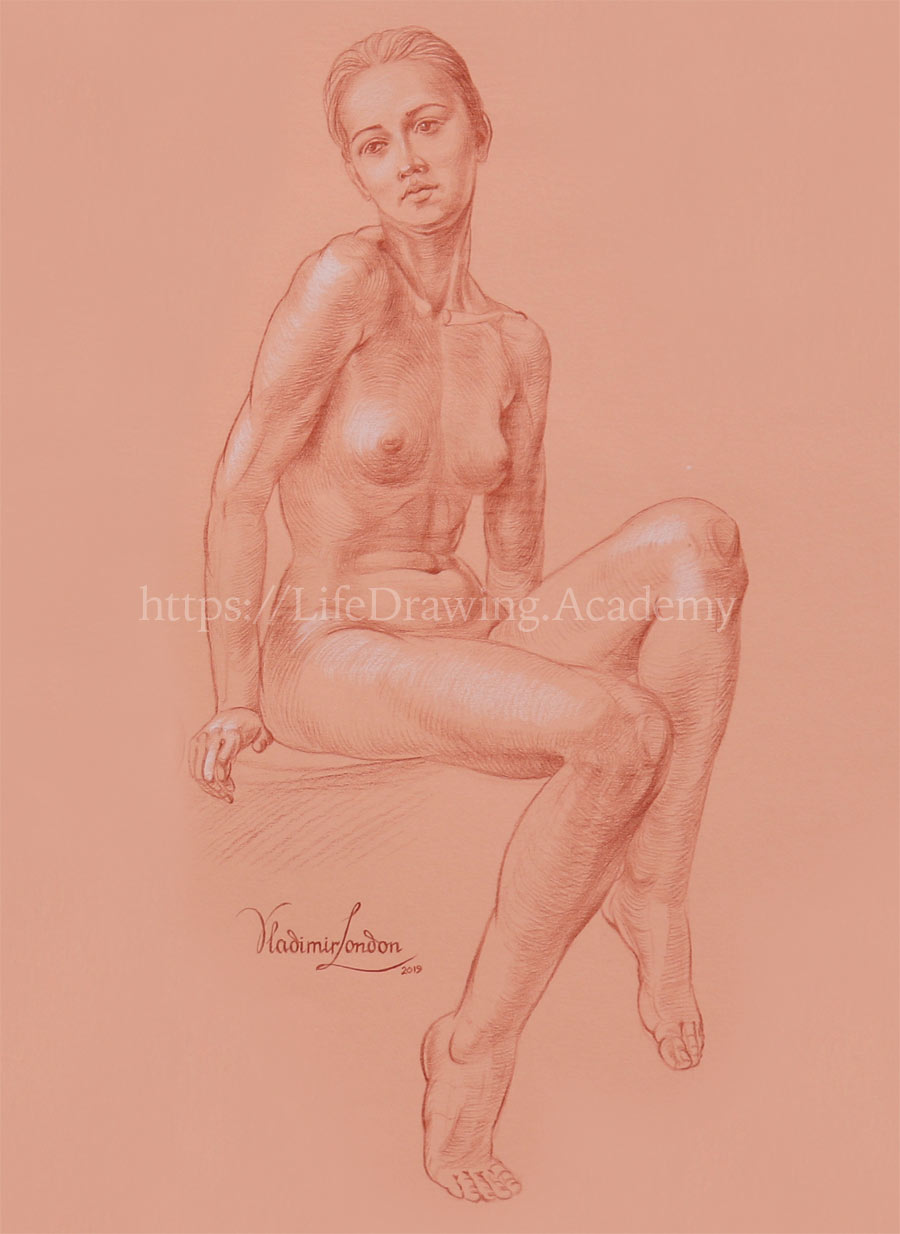
The third sitting pose will complete this artwork. There are many different ways in which artists draw figures from life. In this example, I will show the way when a figure is not built using axes, proportions, measurements, alignments, or signs but is created with organic shapes that represent masses of body parts. For example, when drawing a ribcage, I'm interested in its three-dimensional mass and use several contours to illustrate its volume. The same approach is used to sketch the masses of the upper arms.
At this step, I do not pay much attention to the accuracy of contours and outlines. The relative masses of different body parts and their spatial locations are more important in this method. I visually compare the mass of the ribcage to the mass of the upper arm, for example. How much bigger is it? Because all contours are approximate, I use very light pencil pressure to make faint lines. This way, I will avoid extensive erasing when it comes to fine-tuning outlines. Once again, I compare the mass of the pelvis to the masses of the head, the ribcage, and the arms.
Many beginners use this method intuitively because they lack constructive drawing skills. They have gaps in their knowledge of proportions and anatomy. In this way, they substitute what is missing by drawing arrays of lines in a hope that some outlines will fall in the correct places. I have to say that this method of life drawing works well when supported by the necessary knowledge of proportions and anatomy. Once again, when drawing a leg, I compare its mass to the masses that are already in place. Apart from organic shapes that represent masses, I am also using cross-section contours. So far, the drawing looks more like a fuzzy cloud of lines or a cotton wool figure. When all major masses are in place, I will work on precise outlines. There is no right or wrong method of life drawing as such. Every method has its strengths, and it is a matter of education, habit, and experience which method to use. The choice of one or another technique of life drawing may also depend on the pose, how much time an artist has per drawing, as well as what medium one uses.
As every fine artist is unique, so are the methods of life drawing. I'm sure there are infinite methods and combinations of different ways, including those yet to be invented. The model's left leg is also sketched as an organic oval shape together with its contours. The method of "masses" that I'm using now doesn't mean that I ignore the body's proportions. However, those proportions are not the primary focus of this exercise. They are in place, regardless, whether I actively measure every level, angle, and relative proportion. This is what comes on "autopilot."
When you have enough experience of drawing figures from life using proportions, this knowledge will be there for you. I call it "a feeling for proportions." For example, the length of a foot is slightly bigger than the height of a head. If in doubt, you can always check this relative proportion in life and make sure it is correct in drawing. Also, when drawing arms, you may remember that the forearm is one-fifth shorter than the upper arm. With such knowledge in place, it is hard to draw disproportionate arms, even when you do not measure this proportion in life. The same is true for a hand. It is one-fifth shorter than the forearm. Its length is the same as the height of the face. You don't have to measure these proportions in life every time you draw a hand. This should come "automagically" to your mind if you spend enough time practicing such proportions beforehand.
With the main masses in place, I can continue drawing smaller details with more precision. To do so, I have to shift my focus from body masses to anatomy. The trapezius muscle determines the outlines of the shoulders. The deltoid spans from the acromion and the lateral half of the collarbone and inserts into the middle of the upper arm bone, partly covering the biceps. The two prominent V-shaped muscles of the neck point upward to the base of the skull. They are not straight but spiral around the neck from the pit of the neck to the points behind the ears. The collarbone leads to the acromion, where it connects to the shoulder blade. The triceps shape the back side of the upper arm. They insert into the elbow.
Here's one good tip for drawing figures from life. When you draw a part on one side, do the same on the other side. For example, do not stay on one part of the torso, drawing one shoulder, one arm, one hip and one leg. Instead, draw all parts in pairs—one shoulder, then the other one; one arm and the other, and so on. As you see here, the pale "cotton-wool" lines of masses do not interfere much with more defined outlines I am working on. I don't even have to erase those preliminary lines as they will become part of tonal rendering and will disappear under layers of hatching. Making them any bolder would make drawing more challenging because multiple lines will compete for attention and confuse both the artist and the viewer. The outlines of the hips are shaped by the anatomy of the hip bones and muscles.
I draw the left and right parts of the torso as one unit, paying attention how they relate to each other in sizes and levels. The forearm's outlines have different nature. The outlines of the upper half are formed by the flexor and extensor muscles, while the outlines of the lower half are more influenced by the elbow and radius bones. The outlines of the model's right thigh not only reflect the volumes of muscles but also take into account the chair the model sits on. Cross-sections of the thigh would be different should a model be standing. For example, the lower outline that hangs between the knee and the chair is influenced by gravity. Locating the kneecap always helps to build the correct construction of the leg. Its axis should be parallel to the axis of the foot planes. The tibial tuberosity is another important landmark of the leg. The lateral portion of the quadriceps shapes the outer side of the thigh. And the calf muscle forms the back volume of the shin. The slender calf bone's two ends are visible on the surface—the lateral ankle and the head at the top. Although seen in a similar view, the outlines of the two thighs look different. One outline reflects the forces of the chair while the other is free, but gravity plays its role. It is good to check similar sizes in drawing. For example, I want to make sure that two lower legs have the same size. The distance from the kneecap to the tibial tuberosity stays the same regardless of whether a leg is flexed or extended. This is because the tendon linking these parts is not stretchable. All tendons are very flexible, but not stretchy.
I draw this figure contour by contour, outline by outline. The curvature and direction of every line depends on the anatomy beneath the skin. I can't stress enough that if you want to bring your figure drawing skills to the next level, good knowledge of human anatomy will help. If you have some challenges in understating bones, muscles, and ligaments, Anatomy Master Class is a great place to learn all you need to know about anatomy for artists.
Let's come back to the drawing. The line of the eyes divides the head in half.
A face can be divided into three equal parts:- from hair roots to eyebrows
- from eyebrows to the base of the nose
- and from the nose to the chin.
The height of an ear is equal to the height of a nose, which is one-third of the face. The distance between the eyes is equal to the width of one eye. The cheekbones are on the same level as the base of the nose. The width of the nose wings can be compared to the distance between the eyes. The distance between the base of the nose and the chin divided in half locates the bottom edge of the lower lip. The upper half of this distance divided in three equal parts locates the upper lip edges. You have to keep in mind that all proportions of a human body, head, and face described here or in any other video or a book, are not absolute rules. Should all people have the same proportions, we would all look the same. With constructive drawing in place, we can spend some time rendering tonal values.
Tonal rendering techniques are fully explained and demonstrated in the Drawing Academy course. If you feel you need to polish your fundamental drawing skills, this course would be very helpful. I render tonal values starting from the darkest areas, hatching in multiple layers, and developing values gradually, keeping an artwork complete at all times. This means that I can stop rendering at any time and the drawing would look complete. It might not be finished, but it is ready to be presented as the artist intended. I render highlights in white pencil. When using a white pencil, test first how it works with your red pencil. Some white leads are very waxy and will prevent any rendering on top. Also, go easy with such pencils, as erasing waxy marks can be quite challenging. Tonal rendering shall be done in cycles. First, blocking big areas of shadows, then working on small details, followed by uniting tonal spots into bigger areas with wider strokes. Cycles of going from small details to big areas can be repeated as many times as needed. I will also render some shades beneath the figures, so they won't levitate in the air...
[ The full lesson is avaibale to Life Drawing Academy members ]
This is your unique chance to get a lifetime academy membership and a dedicated team of art teachers.
Such unlimited personal tutoring is not available anywhere else.
Enroll in the Life Drawing Academy now!


