How to Use Pencils
This is your unique chance to get a lifetime academy membership and a dedicated team of art teachers.
Such unlimited personal tutoring is not available anywhere else.
Enroll in the Life Drawing Academy now!
How to Use Graphite Pencils
By Vladimir London
In this video, you will discover all you need to know about how to use graphite pencils the professional way.
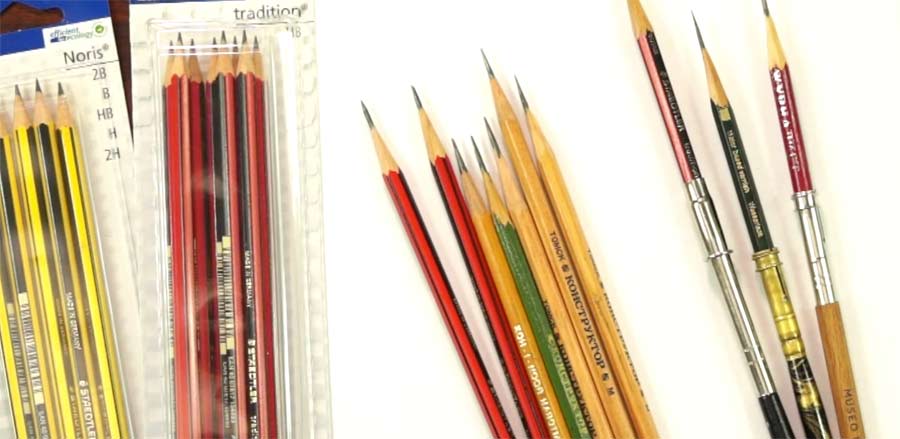
There are many pencil brands on the market. They all make marks on paper. Get any reputable brand wooden-case pencils. HB and 2B grades will cover most of your needs.
Also, get a good-quality pencil extender. They are great for prolonging pencil life. I use them with new pencils, as well, because a long pencil handle is very convenient when drawing from life.
Most brand new pencils come pre-sharpened, but you have to re-sharpen a new pencil to use it properly. For this, get a crafts knife or, if you already have one, replace its blade so it's very sharp.
Now I will show you how to sharpen a pencil the right way. It is an essential skill every artist must have. Unfortunately, many art colleges do not bother to teach this skill. Do not use pencil sharpeners. They are only good for children. Slice the wooden case carefully, so the cut is even, without bites in it. Get some pleasure from the process. Trees used for pencils were growing for many years, so take your time to cut the wooden case. Enjoy how the knife glides along the pencil. The wooden cone has to be smooth and even. Sharpen graphite lead with a knife. Alternatively, you may use sandpaper to sharpen the tip. Also, you may polish the lead by gliding it along paper's surface. Here is what I call a well-sharpened pencil.
Now, let's see what proportions it has. If you place your well-sharpened pencil next to a ruler, aligning its tip with zero, ideally, the cone length should be about three centimeters. The lead should be one centimeter. A longer lead might break easily, and a shorter wooden cone will touch the paper when drawing with the "candle grip."
Now, about the "candle grip"
This is the main grip when drawing on a vertically positioned drawing board. Place a pencil diagonally on your palm and hold it gently but firmly with the little finger. Grip the pencil with four fingers from below and with the thumb from above. The index finger must support the pencil underneath and the thumb push it from above.
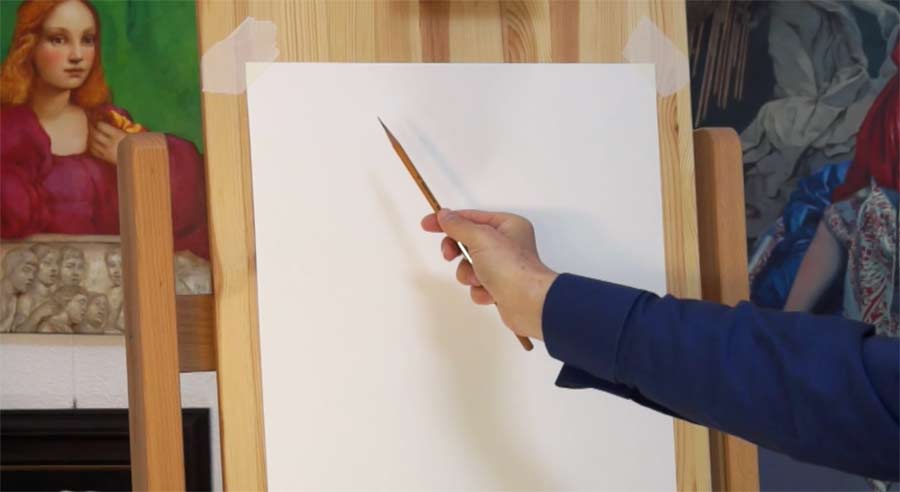
This candle grip allows great freedom of hand movement, which is good for making curved and straight lines on a vertical surface. As you can see, I can move the whole arm rather than just the fingers.
There are certain grip mistakes you need to avoid. Do not hold a pencil with the index finger pushing from above. This severely limits hand movement. When the index finger supports the pencil from below, the hand has much more freedom and can move in any direction with ease. Another mistake is holding a pencil too close to its tip. Hold it closer to its end, or even better, use a pencil extender to get more out of your pencil. This way, you can do longer lines with less movement of the hand. Another common beginner's mistake is gripping the pencil too tightly. Hold it with your fingers and apply only the pressure that is sufficient to make marks. In a way, you only grip the pencil with the little finger, and all the other fingers just support its position.
Drawing lines with the candle grip
Grip a pencil comfortably and make rapid hand movements to hatch a series of lines. By changing the position of the hand slightly, you change the angles of the lines. Hatching in layers is a common way of rendering tonal values in drawing. It is called cross-hatching. Move the whole arm to draw long straight lines. Of course, you have to stand or sit at arm's length from the drawing board. There is no way you could do such long lines with a "writing grip" at the same speed. As you can see, changing the angles of lines is easy with the candle grip. Making curved lines is straightforward as well. You just rotate the hand to draw semicircles.
The way you hold the pencil plays an important role in this exercise. For small details, you might use the writing grip. It is unsuited, though, for longer straight lines and bigger curves.
Here's why the candle grip is important and what it gives you that the writing grip doesn't:
- It allows you to draw at an arm's length, which gives you a better view of the drawing.
- It allows you a simultaneous view of the drawing and the model with only a slight turn of your head or eyes.
- It gives the right angle between the board and your line of sight, removing distortion of the drawing view.
- It allows you to make free-hand lines, straight, curved and circular (without your hand touching the paper).
- It allows you to draw using movement of your fingers (making short lines), of your hand (making longer lines), of your forearm, your whole arm, or your whole body, giving you the freedom to make the full range of lengths, from short lines to very long ones.
- It allows you to draw very straight lines (short or long) at any angle, and
- It allows you to draw more precise circles and curves (big or small).
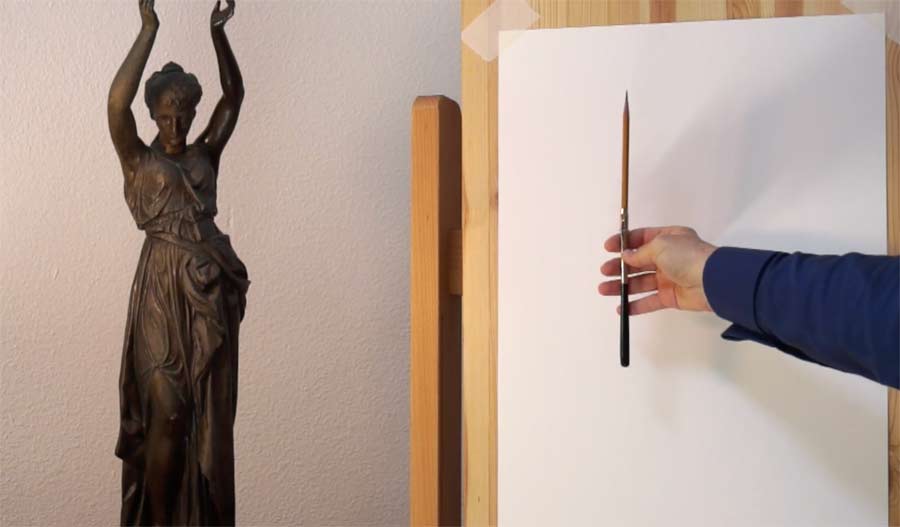
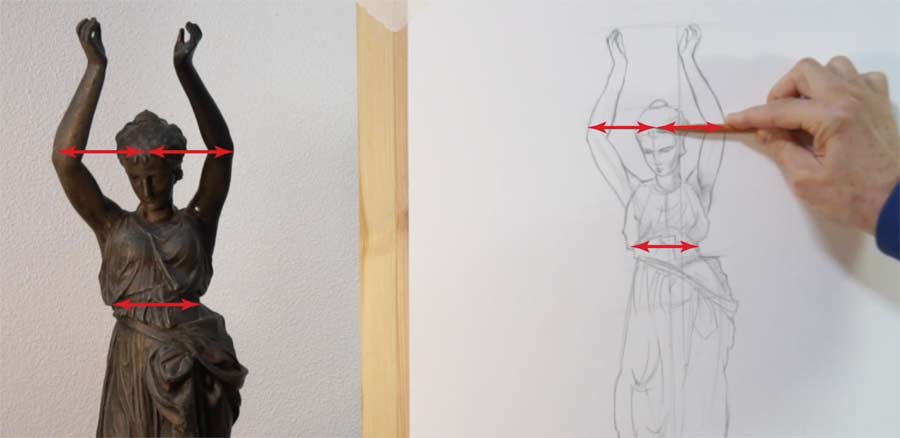
How to measure with a pencil
There are five main ways to measure:
- Measuring vertical alignments
- Measuring horizontal alignments
- Measuring angles
- Measuring cross points, and
- Measuring relative proportions
To measure with a pencil...
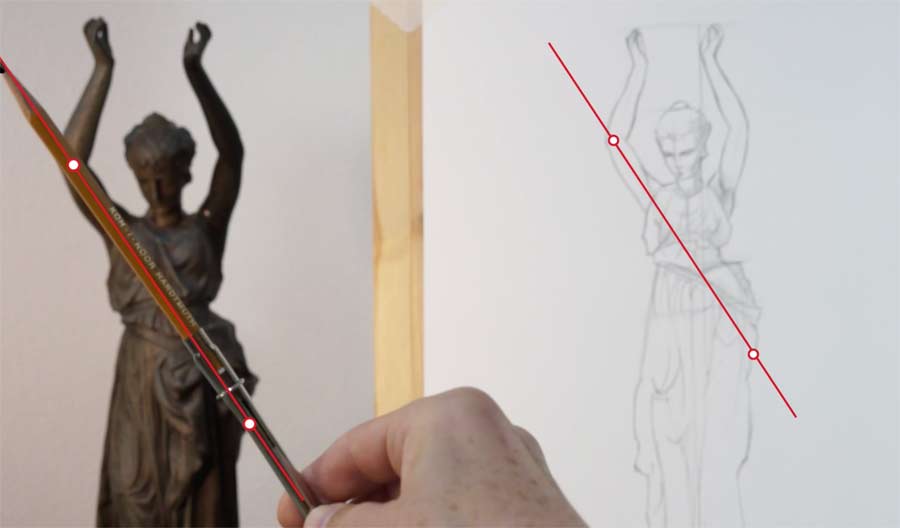
[ The full lesson is avaibale to Life Drawing Academy members ]
This is your unique chance to get a lifetime academy membership and a dedicated team of art teachers.
Such unlimited personal tutoring is not available anywhere else.
Enroll in the Life Drawing Academy now!


