Video by Vladimir London
Enroll in the Life Drawing Academy now!
How to Develop Good Rendering Skills
Video by Vladimir London, a Life Drawing Academy tutor.
In this video, you will discover how to develop good rendering skills; how to hold a pencil the right way, and how to do proficient hatching and cross-hatching.
Let's begin with the exercise of how to hold a pencil with the candle grip.
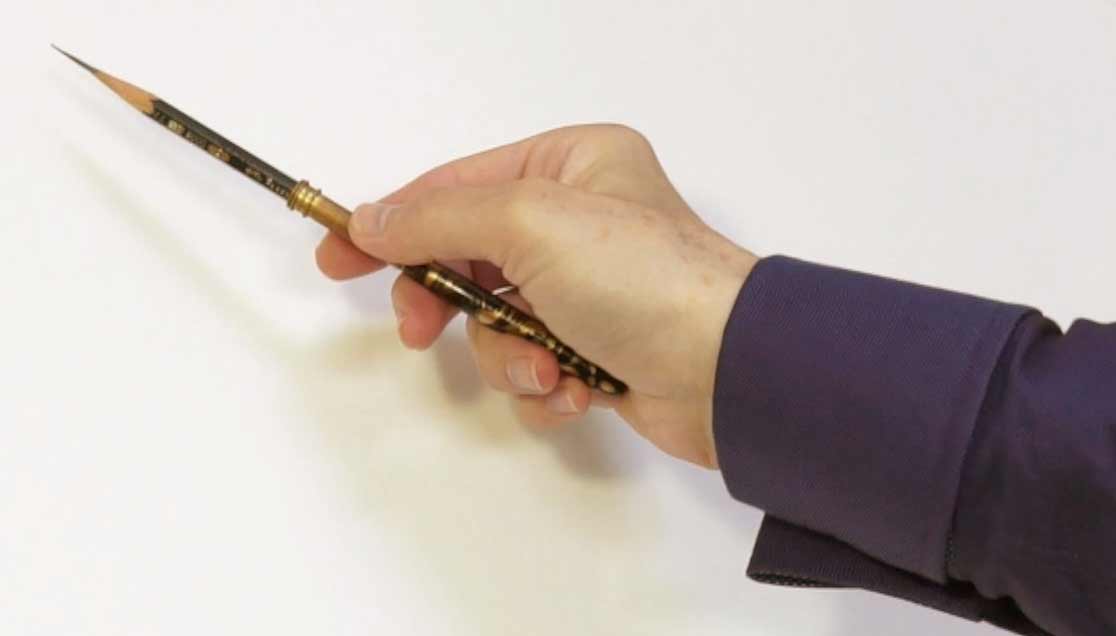
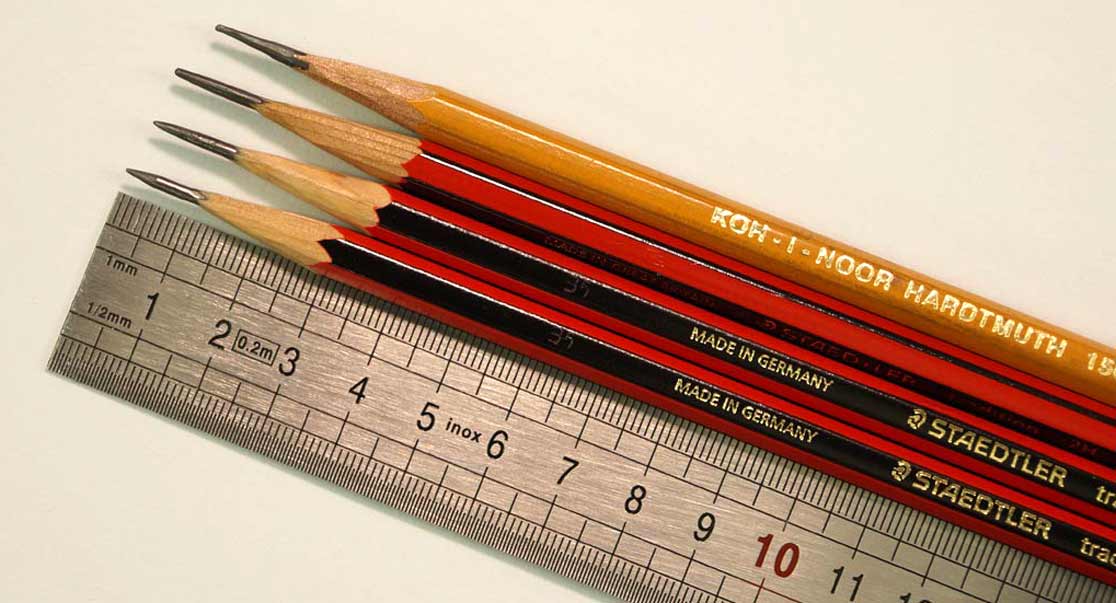
To begin with, get a pencil extender. Even a brand-new pencil doesn't have a sufficient length. Also, make sure that your pencil is well-sharpened. The graphite lead should be exposed for at least one centimeter and the wooden cone should be twice longer - two centimeters; the sharpened end must be three centimeters in total.
Hold a pencil with only two fingers. Place it on the third interphalangeal joint of an index finger and gently push it from above with the tip of a thumb.
Then, grip the pencil's end with the little finger. All three phalanges of this finger should wrap around the pencil.
Remaining two fingers should hold the pencil as it feels comfortable to you.
Check how free my hand movements are with this grip.
I hold a pencil with two fingers and all others just support it.
Holding a pencil at the opposite end gives longer strokes without flexing the wrist too much.
I will show this grip once again. Place a pencil diagonally on your fingers and grip it firmly, but gently.
You can see that with such a grip, it is easy to make small and big movements of the pencil tip.
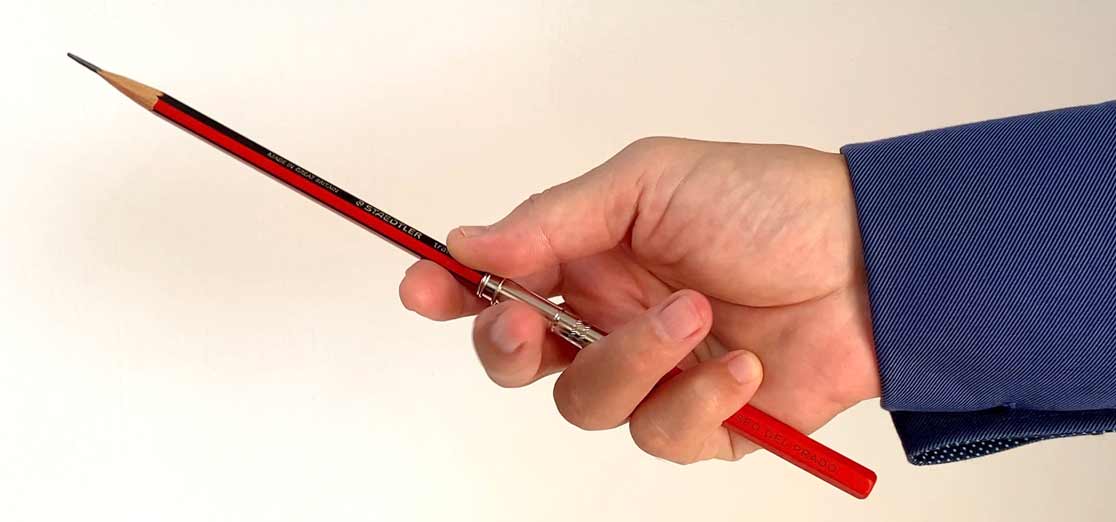
No matter how many times I show how to hold a pencil, students continue making mistakes. So, let's do it once again. Place a pencil diagonally on your palm and hold it gently but firmly. Hold the pencil like a candle; don't grip it too tight. The index finger must support it from below and the thumb pushes it from above; this is important. If you hold it right, your hand will have a great freedom of movement. by flexing your wrist and moving the arm. By moving the whole arm, you can make very long lines in any direction.
Now, let's talk about common errors.
Do not push a pencil with the index finger from above. This severely limits movements of your hand.
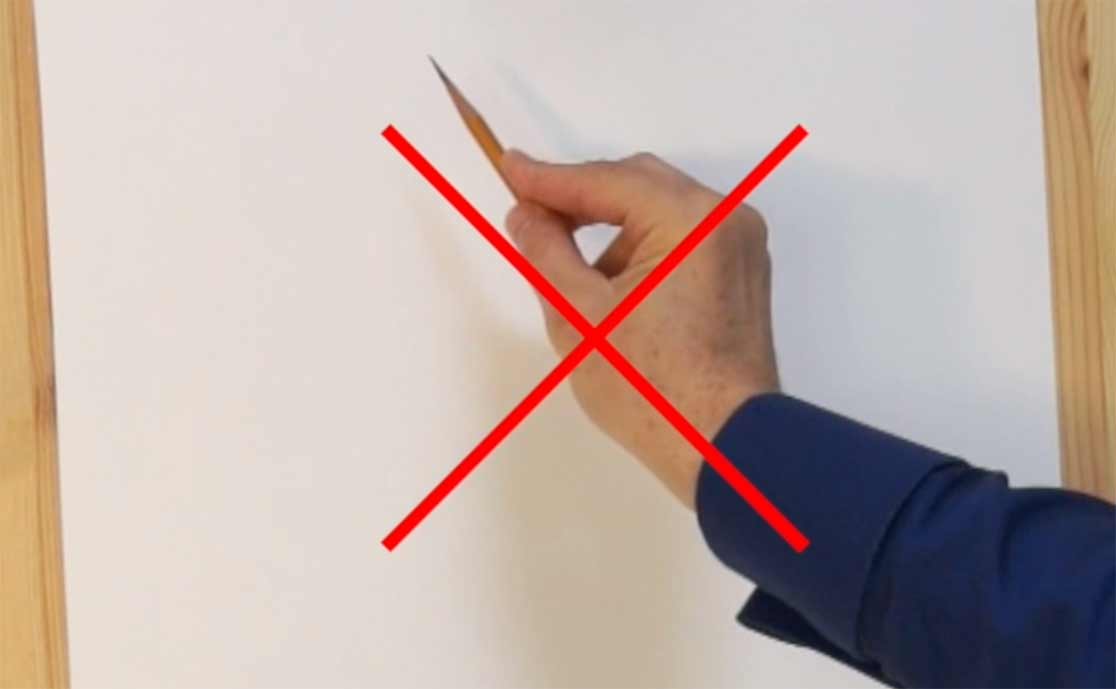
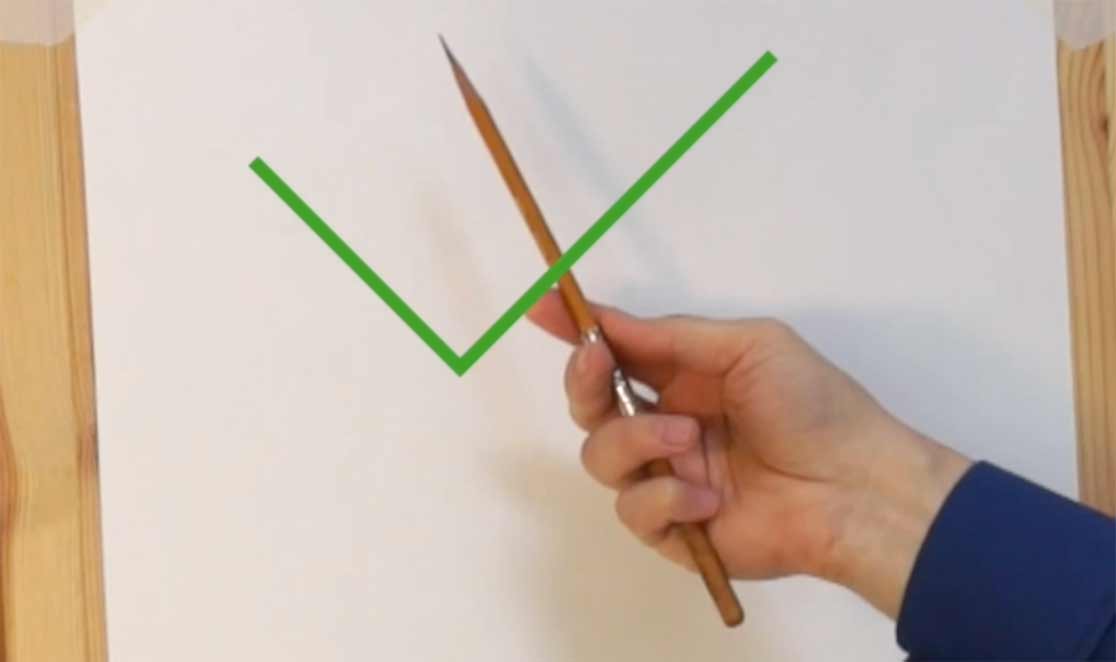
When you place the index finger under the pencil, your hand will have much more freedom. You will be able to make wider strokes by moving the hand, without moving the arm.
Do not hold a pencil too close to its tip. This is not good for hatching lines. Get a pencil extender and hold it at the opposite end. This will give you longer pencil strokes with shorter movements of the hand.
Do not grip a pencil too tightly. Hold it like a small bird - too much pressure will kill it and too loose grip will let it free. You can hold a pencil with only a little finger, and use all other fingers to support it.
Hold a pencil the right way and make fast movements, hatching a series of lines.
Change the angle of hatching and apply another patch of lines on top of the previous one. The lines in different patches should cross each other at some oblique angles. Keep adding patches of hatching to cross previous lines. Such rendering is called cross-hatching. Change the angle slightly for every new layer of hatching. Keep gaps between pencil strokes uniform. Cross-hatching in layers is a common way of rendering tonal values. The more layers you add, the darker the tonal value will become. Also, you may vary pressure on the pencil to get darker lines. Keep such pressure very light and strokes almost invisible to achieve light values.
Here's why the candle grip is important.
- It allows you to draw at an arm length, which gives you a better view of the drawing.
- It allows you a simultaneous view of the drawing and the model with only a slight turn of your head or eyes.
- It gives the right angle between the board and your line of sight, removing distortion of the drawing view.
- It allows you to make free-hand lines, straight, curved and circular (without your hand touching the paper).
- It allows you to draw using movement:
- of your fingers - making short lines
- of your hand - making longer lines
- of your forearm, your whole arm or your whole body, giving you the freedom to make the full range of lengths, from short lines to very long ones. - It allows you to draw very straight lines (short or long) at any angle.
- It allows you to draw more precise circles and curves (big and small).
For drawing on horizontal board and small scale, use the writing grip, not the candle grip.
For drawing circles with the candle grip, rotate your hand at the wrist to draw one half and move the arm to draw the rest.
I will now explain how to develop good pencil hatching skills.
Position your drawing board vertically and fix some big size drawing paper, an A2 sheet, for example.
Here is my well-sharpened pencil and I hold it with the candle grip.
Begin with hatching a series of parallel pencil strokes. They could be slightly curved and tilted at about 15 degrees. Make a patch of strokes approximately 15 by 15 centimeters. The gaps between strokes should be uniform and equal to about three millimeters. Then, apply another patch of parallel pencil strokes at about 30-degree angle. Cover a similar area with the same gaps between strokes. Then, apply another patch at 45 degrees; and one more at 60 degrees. Keep length, curvature and gaps the same, but only vary angle of lines. This exercise is called hatching.
Practice 15, 30, 45 and 60 degrees angles. Measure them by eye; there is no precision needed here.
Repeat such hatching three times. For every exercise with different angles, change the length of pencil strokes. Make 15, 10 and 5 centimeters strokes.
Then, change the gaps between strokes for each exercise. Make 3, 2 and 1 millimeter gaps.
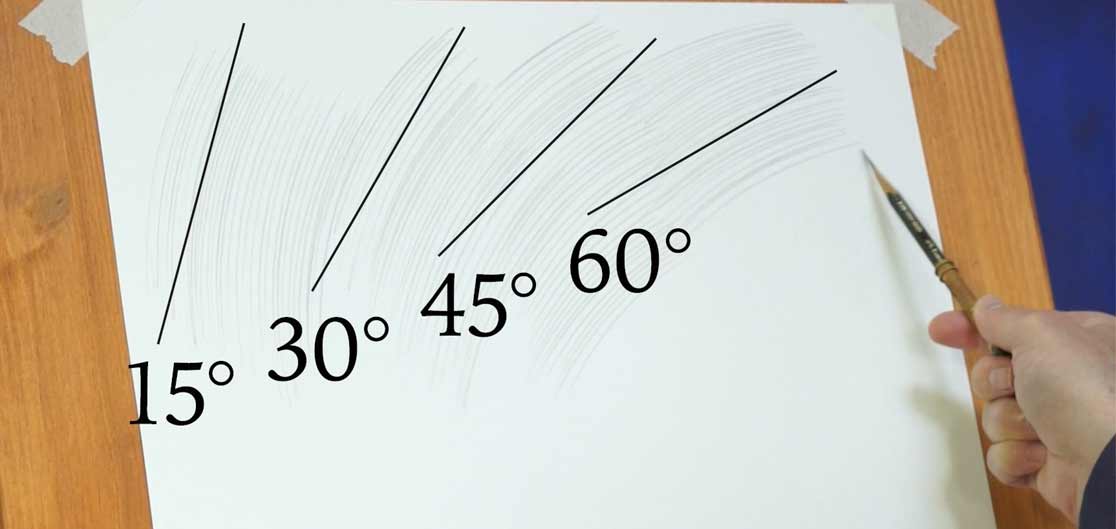
There are following objectives of such exercises:
- To reach a fast speed of hatching.
- To learn effortless hatching at any angle, length and gaps.
- And to develop muscle memory of hatching.
Here are some drawings by students that demonstrate good tonal rendering by hatching and cross-hatching. Check out the different styles of pencil strokes. You can see that these drawings are done by different artists because every hand has its unique style of hatching. Pencil strokes can be long and short, straight and curved, bold and slim, applied at different angles, have wider and smaller gaps between strokes, and so on. Such variation of strokes is called gamut. The wider the gamut is, the better. You need to learn how to render tonal values using different pencil strokes and develop your own and recognisable style of tonal rendering.
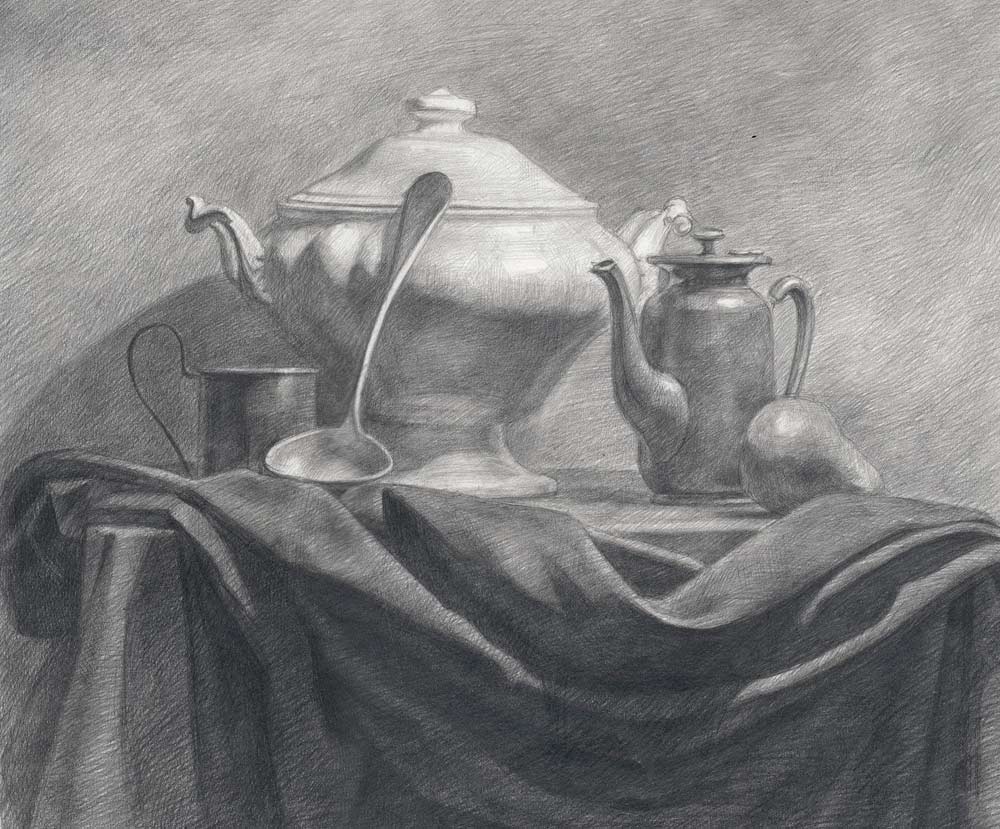
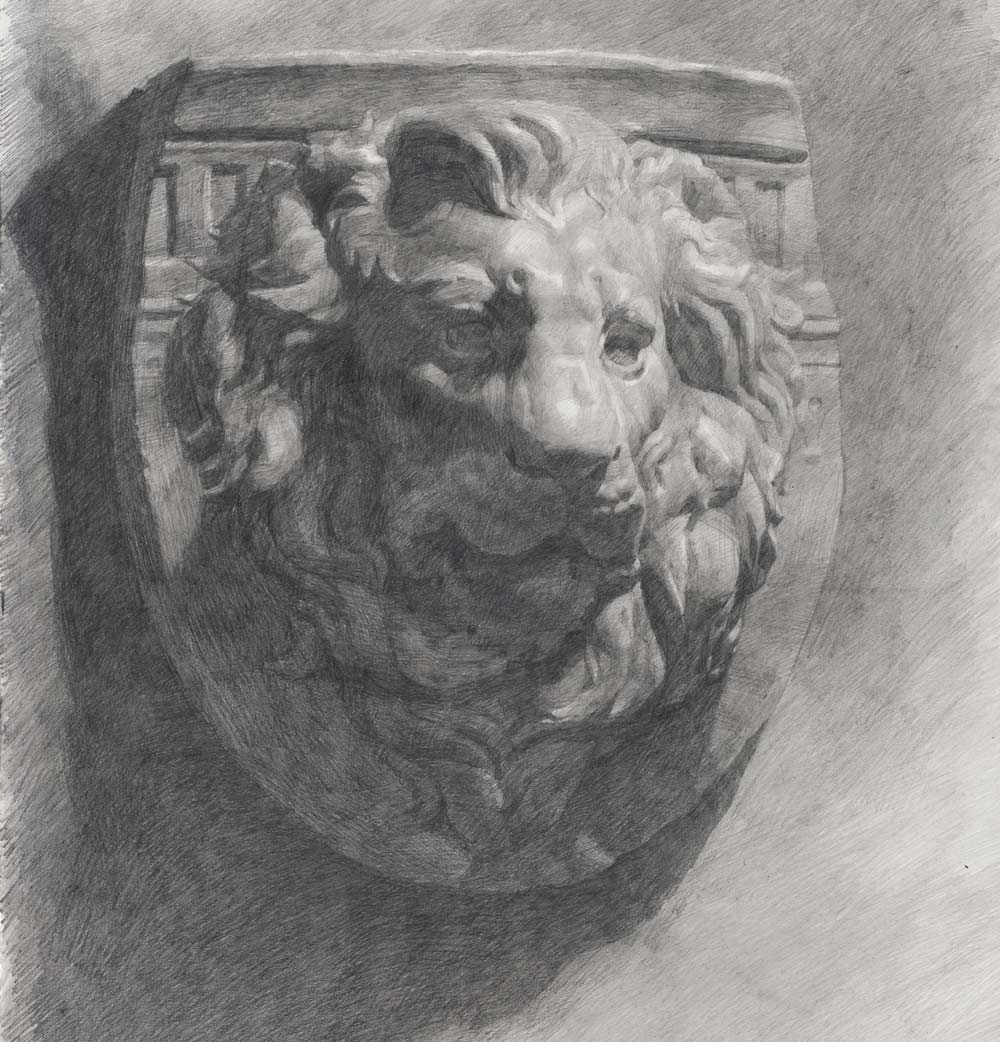
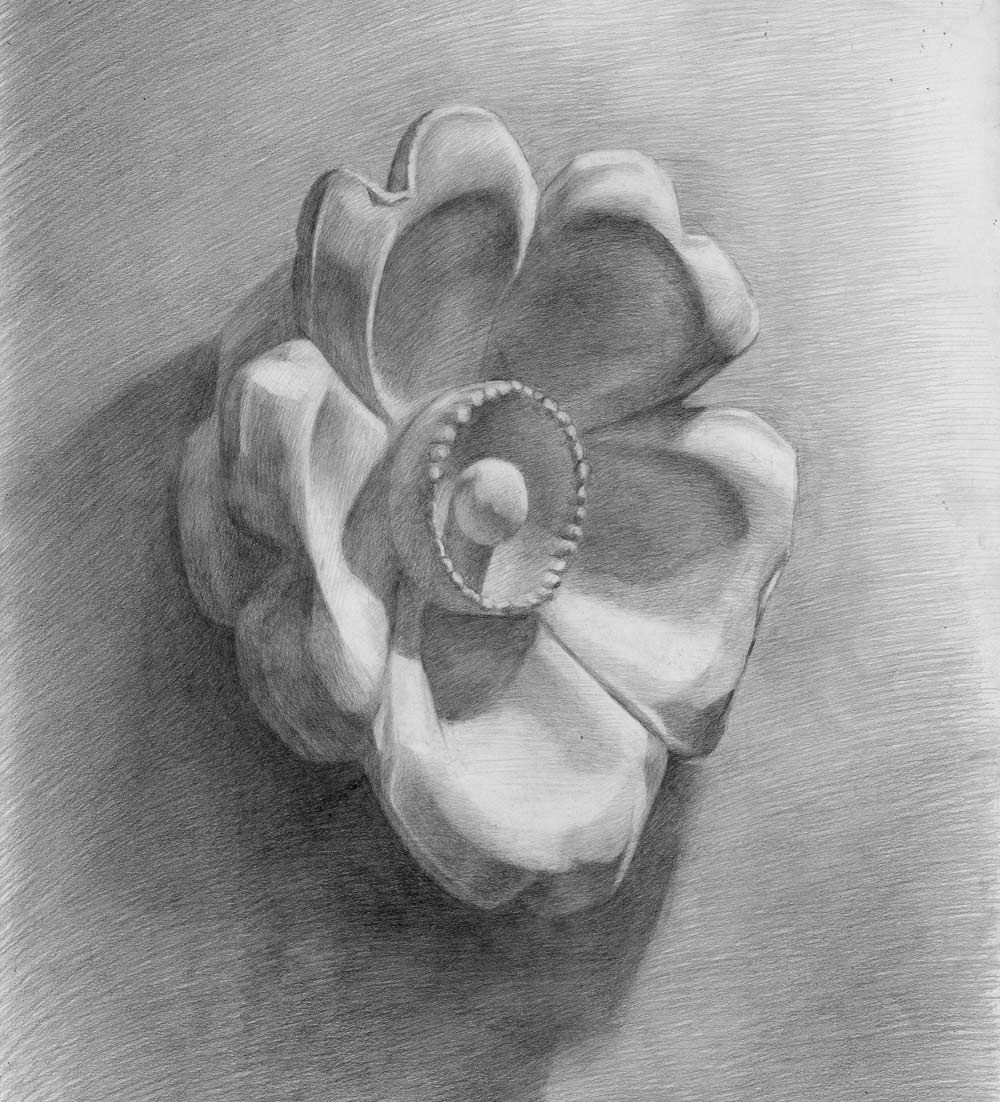
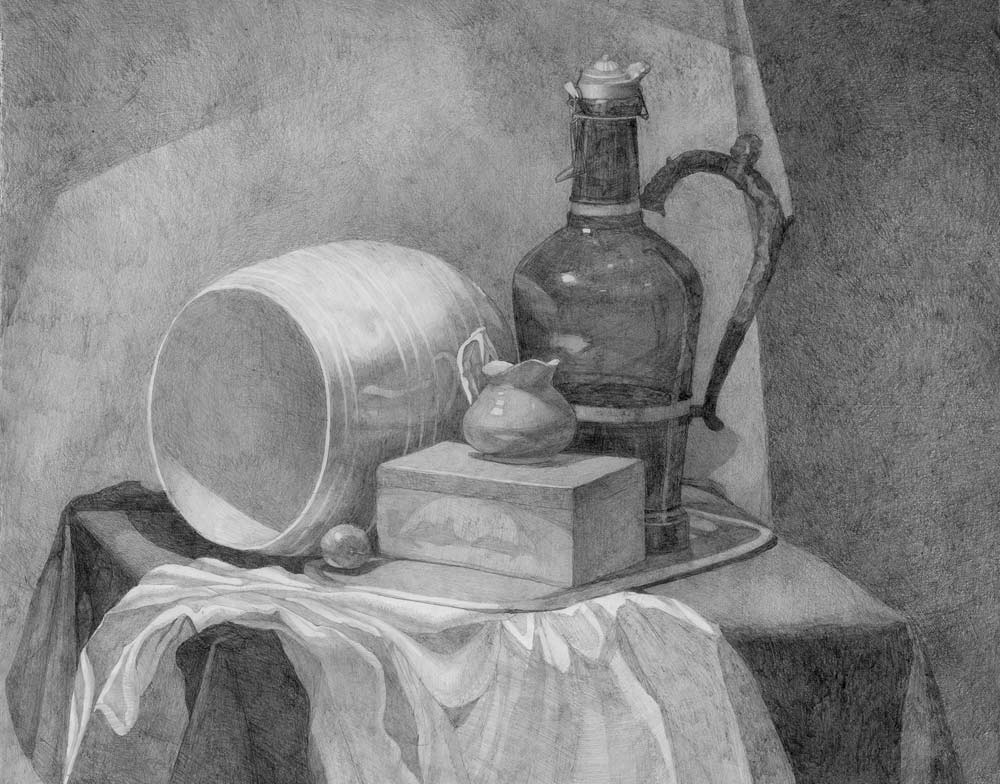
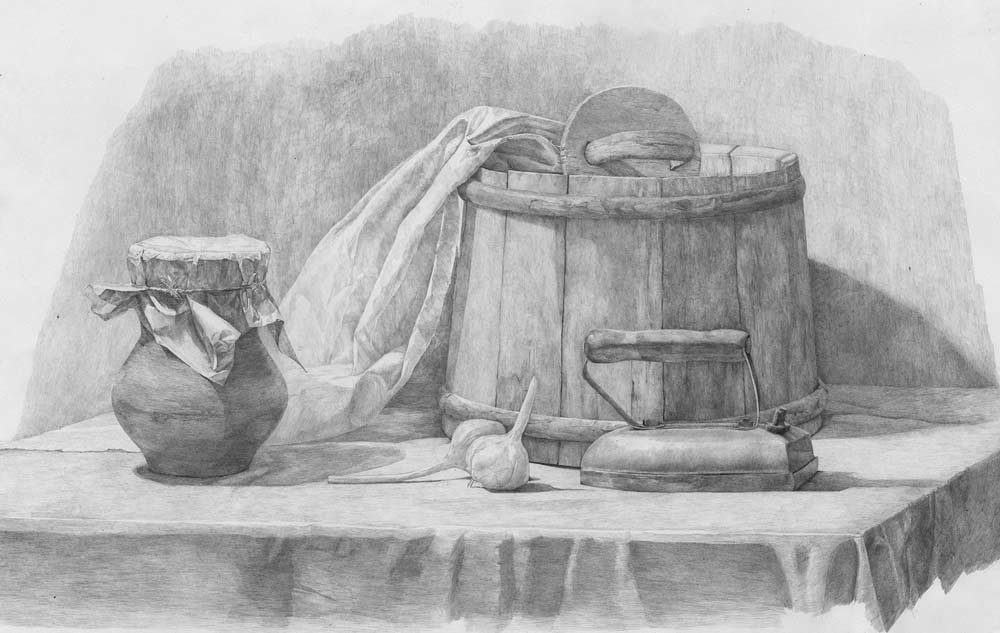
In the Life Drawing Academy Correspondence Course, students learn how to hold a pencil and apply proficient tonal rendering by making various exercises. Here are some examples from different students. This particular task was about rendering tonal gradients from dark to light in different directions - from top to bottom and from side to side.

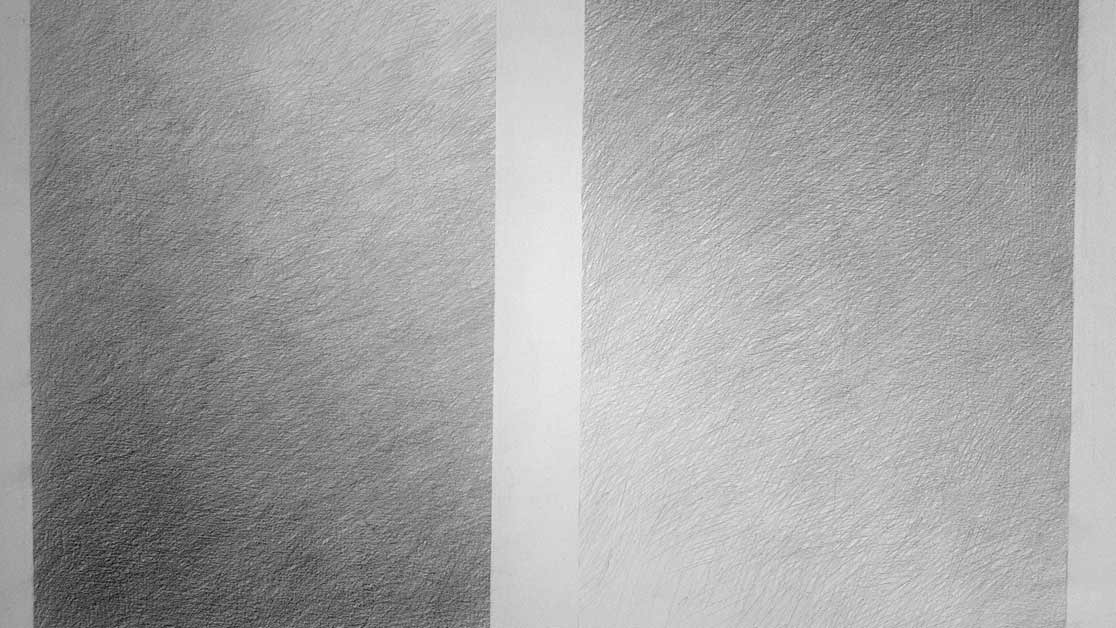


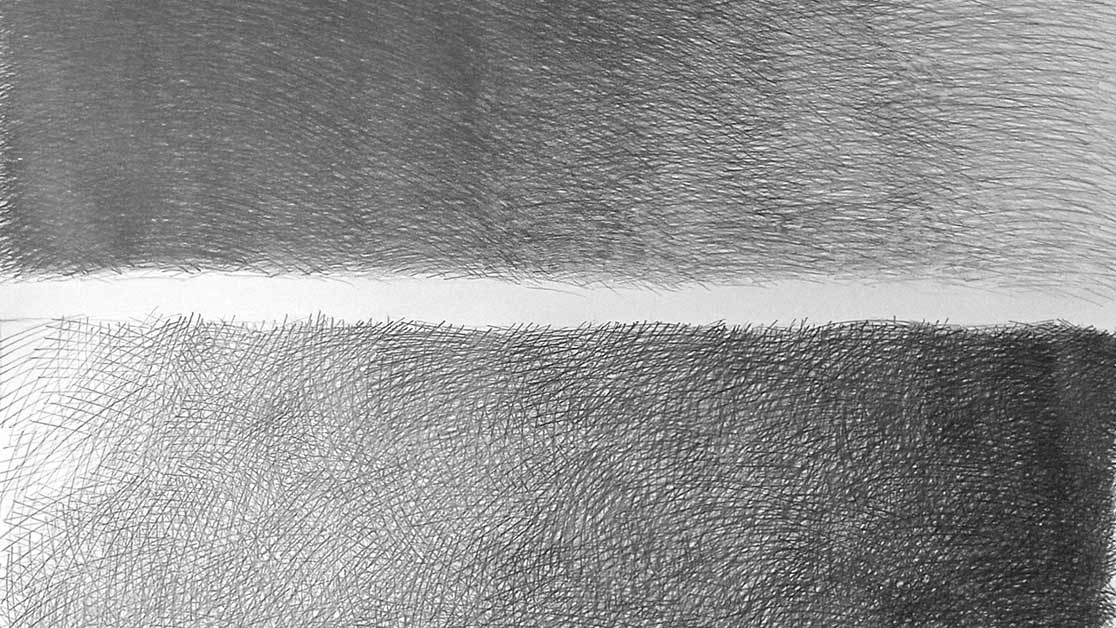
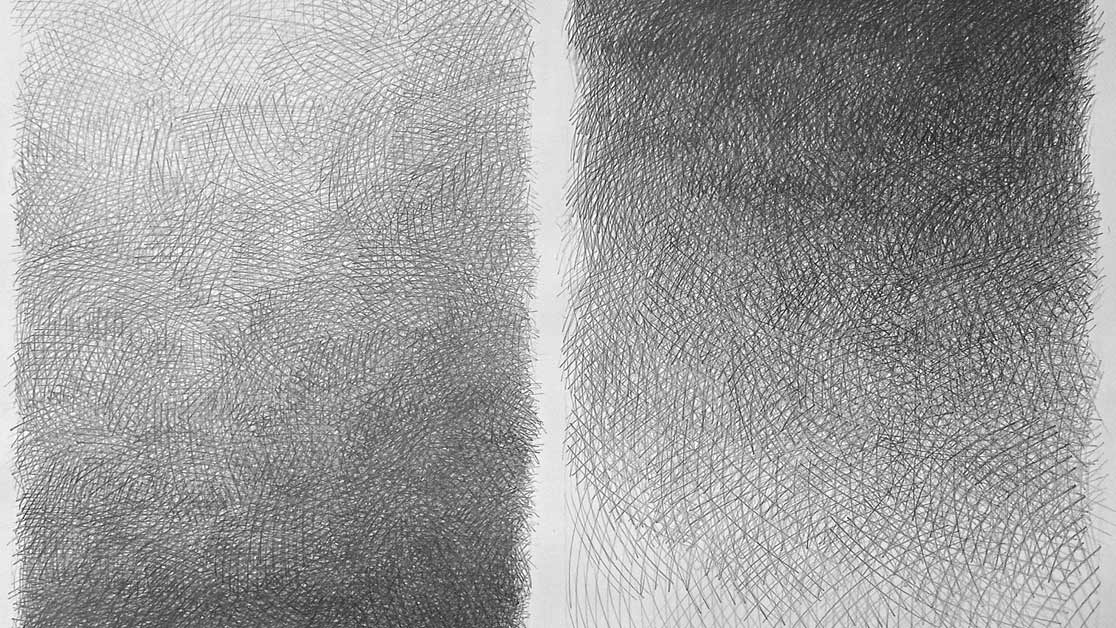


In this course, we check not only the end results, but also the process by watching students' videos. This allows me to give advice on how to improve every step - from sharpening a pencil and holding it the right way to how to apply good pencil strokes.
Beginner students and even some advanced artists make various mistakes of tonal rendering without even realizing they do so. Some amateurs pick up bad tips by watching non-professional videos on YouTube, some were not taught by their art teachers at contemporary art colleges. If you practice wrong ways of rendering and no one will correct you, with time, you will become very good at making the same beginner mistakes. That is why it is so important to get the right guidance from the very beginning. Re-learning is more difficult than learning. To get good drawing skills, you need good tutoring; and to get good tutoring, you need a professional art teacher, who would not only give you instructions on what and how to do, but also will check your performance and advise on how to fix your mistakes before such mistakes turn into bad habits.
You can get such good tutoring in the Life Drawing Academy Correspondence Course. We will check your videos, we will give critiques and feedback on your artworks, and we will guide you step by step, task by task.
Rendering tonal gradients you see in this video is just one part of the bigger task of developing good hatching and cross-hatching skills. There are 100 drawing assignments in the Life Drawing Academy Correspondence Course. The drawing curriculum covers all the topics you need to know to become good at drawing whatever you see or imagine. We will check your videos and will check every drawing you make in this course. We will point out your mistakes and advise how to fix them. We actually guarantee that by the end of this course, you will reach the advanced level of drawing skills. This is because there is no way to fail. We will guide you all the way until you make it. This tutoring is unlimited and covers all the topics from perspective and constructive drawing to how to draw portraits and figures.
To learn good drawing techniques, enroll in the Life Drawing Academy course:
Online Course
A self-study, self-paced course for you to learn fundamental methods of classical drawing and improve life drawing skills by watching video lessons and doing assignments
- Unlimited access to 52 life drawing video lessons
- Lifetime membership without deadlines
- Unlimited support from the Academy tutors
- Constructive critique of your artworks
- Member access to the Academy's Art community
- Place in the Academy's Students Gallery
- Exclusive members-only newsletter and bonuses
- Life Drawing Academy Diploma of Excellence in your name
One-time payment - Lifetime membership
$297 USD
Personal Tutoring Online + Online Course
The ultimate choice if you who would like to receive personal, one-to-one tutoring from the Academy teachers, which is custom-tailored to your skills and needs
- Everything in Online Course, plus:
- Dedicated team of art tutors
- Assessment of your current level of drawing skills
- Personalized curriculum tailored to your skills and goals
- Up to 100 drawing tasks with by-task assessment
- Unlimited one-to-one personal coaching with detailed per-task instructions and feedback
- Artwork critiques and results-oriented guidance
One-time payment - Lifetime membership
$997 USD


