How to Draw Cylinders from Life
We received the following question from our student:
"How do I find the vanishing point (or the horizontal line) to draw a cylinder the right way?"
Answer from Vladimir London, Life Drawing Academy tutor
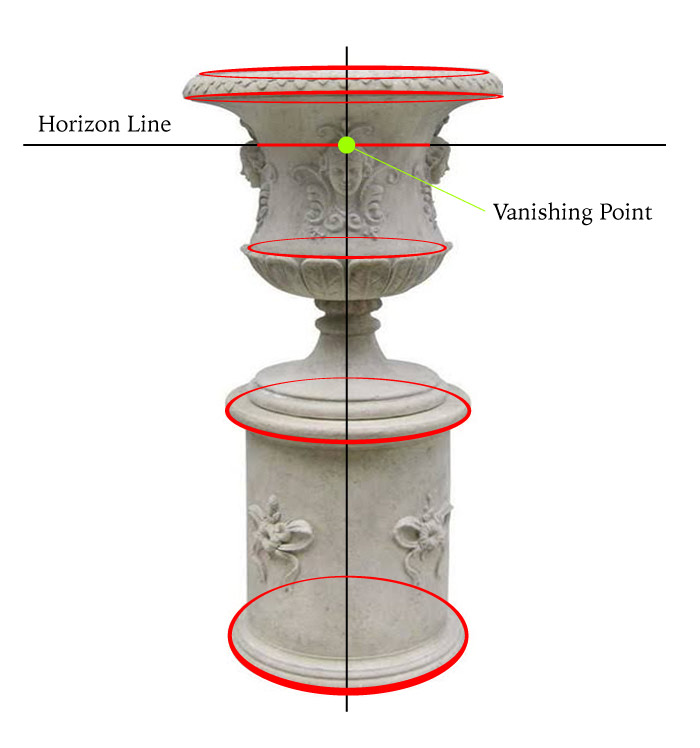
When you're drawing from life, the horizon line always will be at your eyes level. There is no guessing needed. All objects and elements above that line would be seen from below; and we see from above all objects that are below the horizon line.
Horizontally located circles appear as ovals in perspective. However, when a circle is at the horizon level, it is seen as the straight line. The vanishing point for a standing cylinder will lie on the horizon line. Because a standing cylinder can be depicted in one-point perspective, this vanishing point will be where the horizon crosses the vertical axis of cylinder's symmetry.
You do not need this point to draw a cylinder. The location of the horizon and the cylinder's proportions you measure from life are sufficient to depict a realistically looking cylindrical object.
The vanishing point can be used if, for some reason, you want to draw a cuboid that contains a cylinder. This helps to draw more complex architectural constructions, such as domes of buildings, classical column capitals, or urns with cuboid plinths.
Coming back to the "How to draw a cylinder the right way" question. There are many ways of drawing cylinders. I'll give you the method I use.
When drawing a standing cylinder from life, the first question you need to solve is how high and wide the cylinder is, by measuring the cylinder's main proportion - the width-to-height ratio. You can use a pencil to measure this proportion or do it by eye. There's a Life Drawing Academy video where I show How to Measure with a Pencil
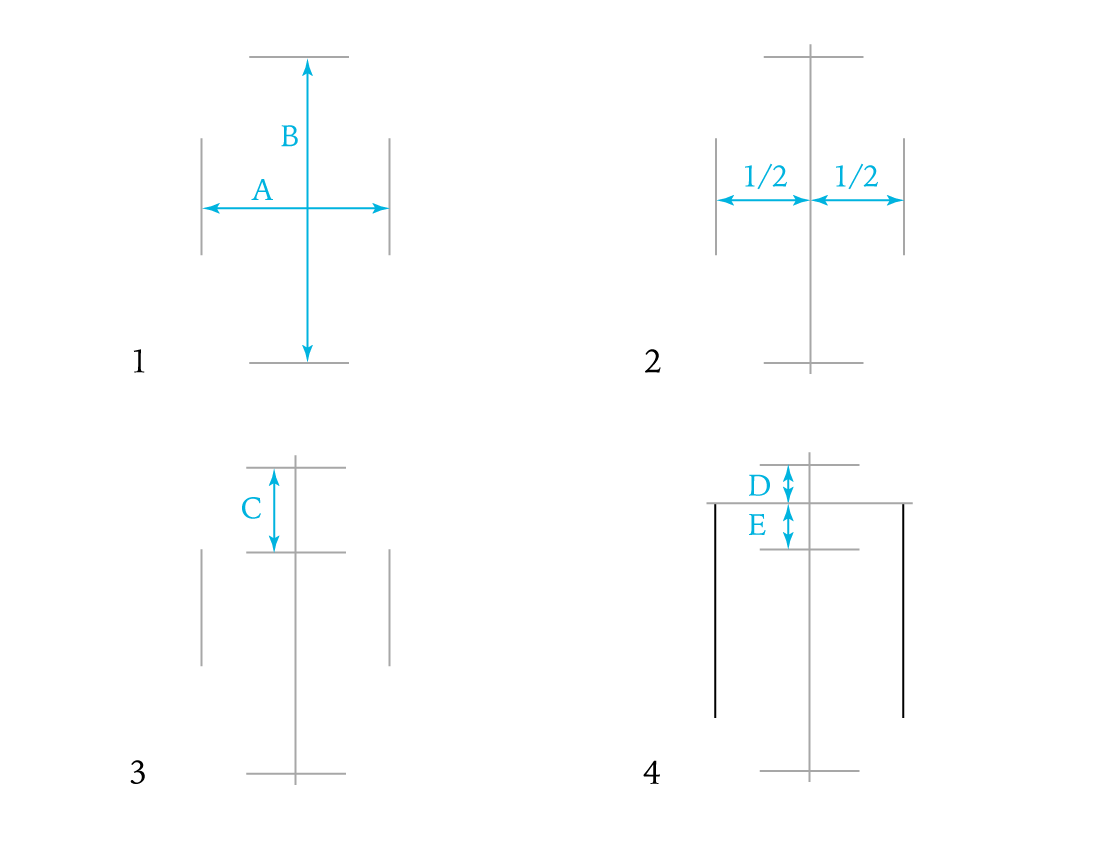
- So, the first step is to find the main "A-B" proportion and mark it on paper.
- The next step is straightforward - divide the width "A" in half and draw the main axis of cylinder's symmetry in the middle.
- If we see a cylinder from above, its top circular plane will appear as an ellipse. Measure its height as the relative proportion to the cylinder's width or height. Mark the height of this top plane "C" on the drawing.
- Draw the main axis of the oval. It goes horizontally slightly off-center, so the dimension "E" is a bit bigger than "D". This happens because all objects that are closer to a viewer, appear bigger in perspective than the objects located further away. One part of an oval is closer to us than another, hence E > D.
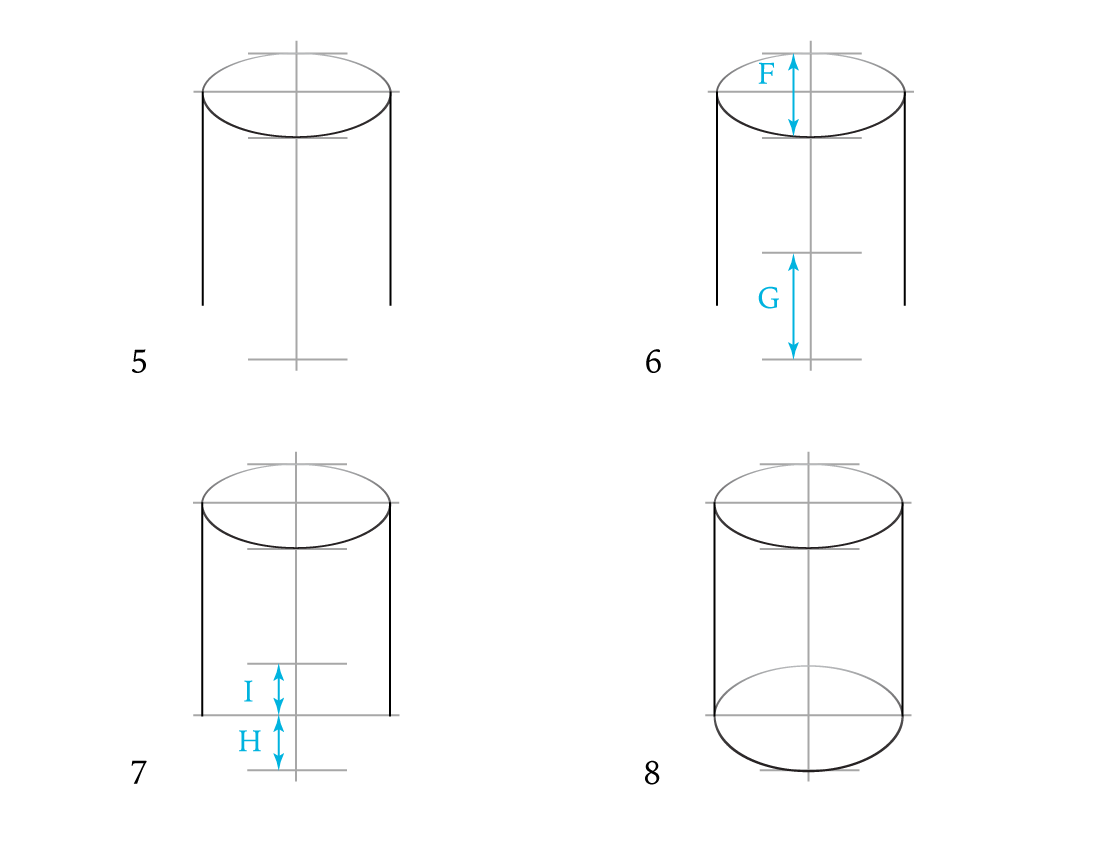
5. Draw the top plane. It will be an ellipse when we see a cylinder in front of us. It might be an oval should we count other distortions of perspective. Using terms "ellipse" and "oval" is the topic for a separate discussion. The term "oval" includes the definition of "ellipse" and doesn't require some distortion disclaimers, so I will use this word for the purpose of this explanation.
6. The next step is to compare in life how much bigger the top oval than the bottom one is. Unless the object is made of glass and transparent, you won't see the height of the bottom oval in full and have to make your best guess.
7. Mark this height on the drawing and divide it into two parts, making sure that the part "H", which is closer to us, is a bit bigger than "I".
8. Draw another oval representing the bottom plane of the cylinder. Do it as if you can see through the object and depict the invisible part of the oval as well.
Drawing all objects as transparent helps to avoid junior mistakes of construction.
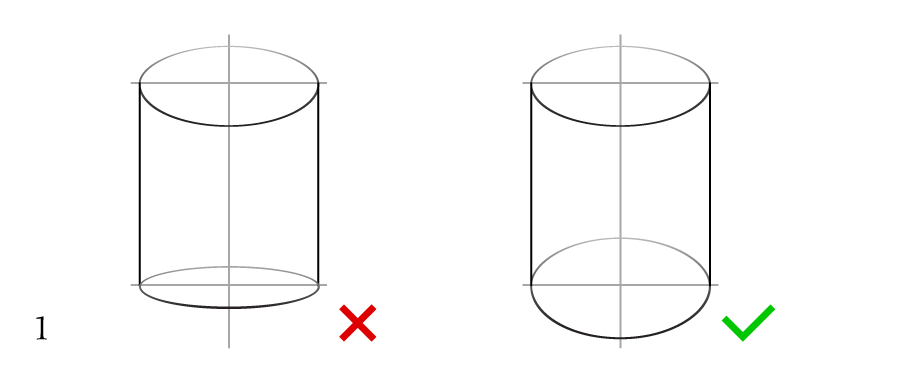
Talking of mistakes, here are four typical errors beginner artists do:
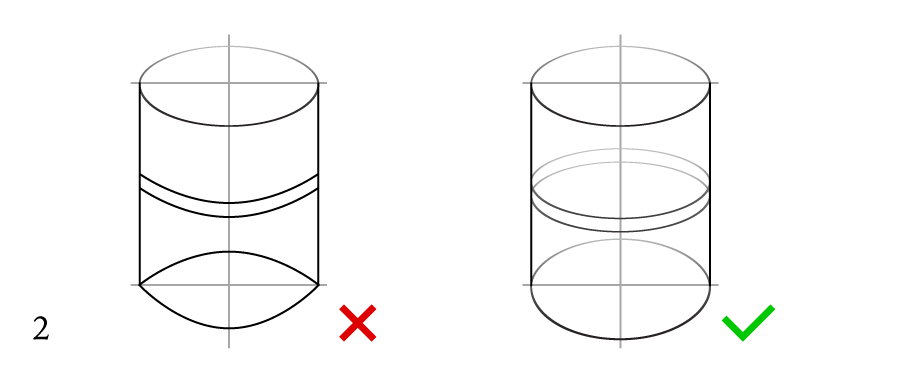
1. Do not flatten the bottom oval. In our example, it is the fullest.
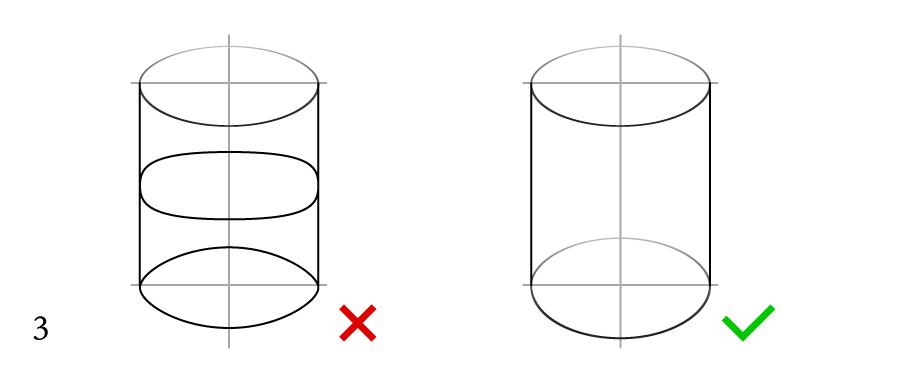
2. Do not draw sharp corners of an oval. Ovals are foreshortened circles. Circles do not have sharp edges, neither do ovals.
3. Do not draw squarish or too pointy ovals. Their curvature has to be smooth in all places.
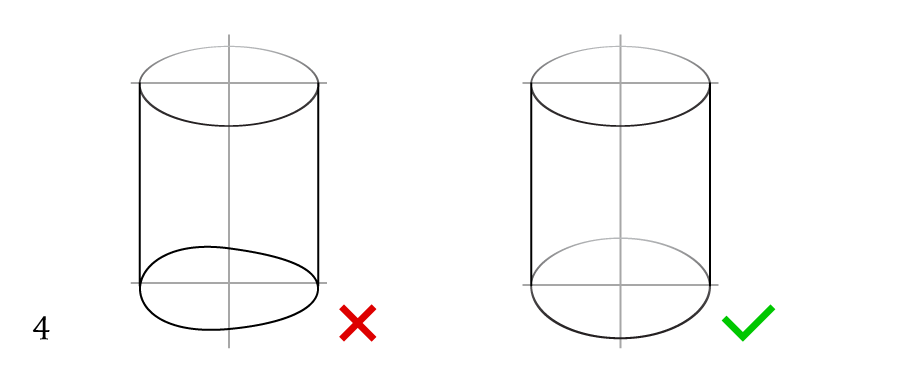
4. Make sure the oval is fully symmetrical along its secondary (shorter) axis.
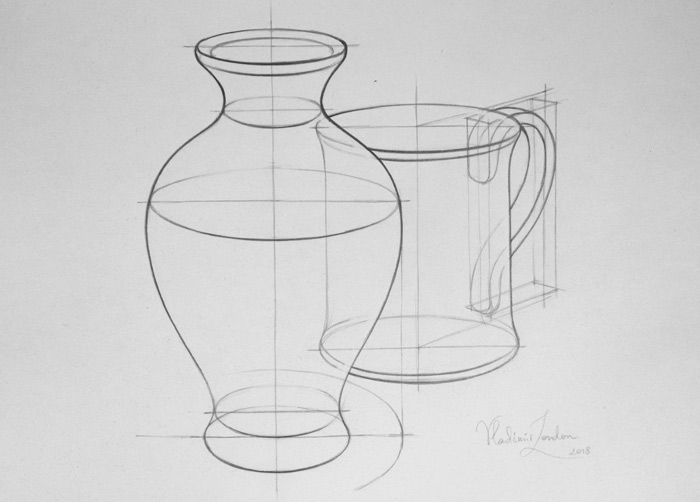
Don't forget to apply the rules of aerial perspective. Those objects that are closer to a viewer will appear sharper and bolder than those further away that should be depicted with less pencil pressure and contrast. In such a shallow object as a cylinder, you won't see in life aerial perspective. This is where the main principle of constructive drawing has to be used - a proficient artist should draw not one sees, but what one knows. This is fully applicable to aerial perspective. Even though you might not see it in life, it helps to emphasise such a perspective to make artworks more believable and realistic.
You may check one of my constructive sketches to see how some lines are bolder and stronger than others. This is the aerial perspective in drawing.
Such constructive drawing principles are not only needed for depicting cylinders and man-made objects, but they are fully applicable when drawing figures and portraits from life. Without understanding of how to draw geometrical objects constructively, it is very challenging to draw realistic figures and portraits from life, memory and imagination.
I hope this helps.
To your creative success,
Vladimir London
Drawing Academy tutor
To learn good drawing techniques, enroll in the Life Drawing Academy course:
Online Course
A self-study, self-paced course for you to learn fundamental methods of classical drawing and improve life drawing skills by watching video lessons and doing assignments
- Unlimited access to 52 life drawing video lessons
- Lifetime membership without deadlines
- Unlimited support from the Academy tutors
- Constructive critique of your artworks
- Member access to the Academy's Art community
- Place in the Academy's Students Gallery
- Exclusive members-only newsletter and bonuses
- Life Drawing Academy Diploma of Excellence in your name
One-time payment - Lifetime membership
$297 USD
ENROLL NOW
Personal Tutoring Online + Online Course
The ultimate choice if you who would like to receive personal, one-to-one tutoring from the Academy teachers, which is custom-tailored to your skills and needs
- Everything in Online Course, plus:
- Dedicated team of art tutors
- Assessment of your current level of drawing skills
- Personalized curriculum tailored to your skills and goals
- Up to 100 drawing tasks with by-task assessment
- Unlimited one-to-one personal coaching with detailed per-task instructions and feedback
- Artwork critiques and results-oriented guidance
One-time payment - Lifetime membership
$997 USD
ENROLL NOW