Sculpting lessons at Life Drawing Academy
Enroll in the Life Drawing Academy now!
How to Cast a Nose Sculpture
Video by Vladimir London
In this video, I will show you how to make a mold and cast a sculpture of a nose in resin plaster. Here's the nose model we will get by the end of this demo.
In the previous lesson, I sculpted this nose model in plastiline. The link to this video is in the description. Now, I can use this wax clay model for mold making. To prevent silicone from sticking to the wooden board, I cover it thinly with a release agent. It is very important to check that this stuff doesn't contain sulfur, which prohibits silicone hardening. I apply this waxy paste with a brush. There is no need in covering the whole board, only those parts that are next to the model. Also, I use the same release agent to grease the whole sculpture. Although it is unlikely that silicone would permanently stick to plastiline, I would better smear it to make separation easier. It is important to cover as thinly as possible to avoid visible brushstrokes on the model surface.
The next step is to prepare silicone. This kind of silicone for mold making consists of two parts, which have to be mixed in equal parts by weight or volume. Using some accurate scales with one-tenth of gram precision is the preferable way to measure. The part "A" is clear and I add 50 grams of it into the measuring cup. The same weight has to be added when it comes to the part "B". It is green in color, which is probably done by the manufacturer to clearly differentiate between parts "A" and "B". For some reason, the video camera doesn't detect numbers on the screen, but I measure exactly the same weight as previously; so the mixing ratio is one-to-one. Two parts of silicone have to be mixed for several minutes. Make sure you scrape with a stick the bottom and walls of the container because if some liquid left unmixed, it would never harden. I will fast-forward the mixing process, but once again, take your time to mix silicone as thoroughly as possible.
I will brush-on mixed silicone with the same brush as used for smearing the release agent. It is a cheap synthetic brush, which can be cleaned afterwards with paper towel and turpentine. A strip of silicone on the board around the model is about half an inch wide. There is no need to make it any wider. This kind of silicone is rather liquid. It is easy to work with. Also, it hardens slowly, which gives enough time to brush it in a thin layer. As far as I understand, this tin silicone is engineered for pouring, not brushing; although the manufacturer does not provide much information apart from the mixing ratio. Anyway, I think it will be suitable for the purpose of mold making. The purpose of the first layer is to cover the entire model surface without any gaps and bubbles. It is better to do it with liquid silicone in a very thin layer. When the first layer will become touch-dry, I will build up the mold thickness by covering the model with several layers of silicone. Every layer has to dry a bit before applying the next one. It is important not to overdry silicone because the next cost won't stick. Also, because this silicone is too liquid for brushing-on thick layers or applying it on vertical surfaces, I will add the thickening agent. This way, tin silicone will increase viscosity and become a paste rather than liquid. The thicker silicone will create an impasto effect, but it doesn't matter because the first layer would hold minute details and polished surface. Here's one important tip - make sure that the model's nostrils are completely filled in with silicone. Otherwise you would have trouble with disassembling a hard mold when taking out the cast sculpture.
When the soft silicone mold is fully dry, I can cut off four edges, leaving about 8 millimeters of the shoulders on the board. For this purpose, I use a metal ruler and a very sharp scalpel. The scalpel glides easily through the silicone coat, which is about 3 millimeters thick. I did not build it up thickly because the model's shape is simple and there is no need for a very robust mold. The release agent serves its purpose well and it is very easy to remove bits of silicone from the wooden board. Now, I want to test some mechanical properties of this silicone. Let's see how much it can elongate without breaking. I can easily stretch 3 centimeters into 12, which is four times! This is very good. I also want to see how much force is needed to break this piece into parts. I can tear it with my fingers, but because it is very elastic, I think it will serve well as a soft mold.
Before making the hard mold, I will add a bit of release agent on the wooden board, to prevent gypsum sticking to it. It can be done with a brush or even with fingers. For the hard mold, I will use a gypsum bandage. First, I will cut it into smaller pieces. Gypsum bandages are very easy to work with and suited for small to medium size molds. I dip one piece into water for about two seconds, let water drip from it, and fold it in half. Folding is necessary to get more gypsum per square inch. Then, I apply that piece on the model, pressing it lightly to avoid air bubbles beneath. The hard mold will consist of two halves. That is why I begin from the central line of symmetry. The gypsum cloth hardens rather fast, so you have less than one minute to arrange it the way you want. The next piece is moistened and folded in half as the previous one. I will overlap the first layer to build up thickness. Every next piece of gypsum bandage has to overlap the previous layer at least one centimeter. Because this model is very small, the hard mold can be rather thin. Two layers of bandages folded in half give four layers of cloth. However, in places where the next bandages overlap them, there are eight layers in total, which is totally sufficient for the purpose of this mold. I remove excess water with a paper towel.
The first half of the hard mold is complete and dry by now. It is better to dry it for a couple of days or at least overnight before continuing. Now is the important part. To prevent two parts of the hard mold fusing into an inseparable unit, I need to cover the gypsum edge with the release agent. I do it thoroughly with the brush. I will cut more pieces of the gypsum bandage for the second part. It is better to precut several pieces in advance than to handle the bandage roll with wet hands afterwards. The process of applying bandages is rather simple. I wet the piece, fold it in half and drip excess water. However, to form a thicker boundary between two mold parts, I fold the edge once again and push it closely to the first part. Next pieces will overlap the previous to glue together into one rigid unit. Now, the interesting part. For two mold parts to lock into place when assembled together, I add a small piece that slightly overlaps the first part. There are two more such keys on both sides of the mold.
When the mold is dry, I can take it apart. It is better to wait for at least 24 hours before doing it. As you can see, the thickness of the hard mold is about three millimeters, approximately the same as the soft mold. The hard mold is very firm and light. I will wrap it with the masking tape so the two parts stay together. The reason I made two parts instead of one is to avoid the difficulties of removing a cast model from the mold.
I can now release the soft mold. It gets off easily from the plastiline model. You can see that this silicone mold is very thin. In some places, it is only two millimeters. Also, it is very soft. That is why the hard mold is needed to hold its shape. The soft mold sits perfectly inside the hard one.
Before casting, I will make a wire hook. This hook could be used to hang a model on a wall. I have to say that making a hook is completely optional. Nevertheless, I will show you how to add it into the model. Because the hard mold cannot stay level on the horizontal surface, I will put it into a bowl with sand. This way, it is very easy to fix the mold.
For the next part, I will need a measuring cup because plaster and water are measured by volume, not weight. For casting, I will use resin plaster. It is white, fine and hard. I measure about 150 milliliters of plaster for the front side of this sculpture. Water can be measured by volume or weight because one milliliter weighs exactly one gram. So, I will use scales for this purpose. Here's the important bit - add plaster into water, not vice versa. It is better to pour plaster bit by bit, allowing it to soak as you do it. I will mix plaster with a spoon, making sure it is homogeneous throughout without dry lumps. The mix is not very liquid and I pour it with a spoon. Now, the next task is to spread this plaster all over the silicone mold without trapping any air bubbles. Because its consistency is yogurt-like, it is actually easier to do with a finger. I need to make sure that plaster covers all walls up to the edge. Of course, it is perfectly possible to mix up the sufficient volume of plaster to fill in the entire model. However, I want to show you another way, where you could use a little bit of high-quality expensive material, like this resin plaster, for the surface of the model and fill in the rest with cheap plaster. Quality of the model would be the same because on the surface you will get good material, but its cost will be lower because simple gypsum is about ten times cheaper than resin.
When all walls are covered with resin plaster, I need a batch of cheap plaster fast. For this purpose, I measure volumes of water and gypsum by eye because I did it many times and know what to expect from this material. Once again, I add powder into water, not the other way around. After quickly mixing gypsum, I add this mix into the mold with a spoon. It is a very fast drying plaster; so, you have to work without any delays. Before this plaster sets hard, I have several seconds to push the wire hook inside. The surface can be smoothed up with a palette knife. By the way, before sticking the hook, check the right side, not to place it upside down. When the plaster surface is set, but not too hard, I need to dig a small hole around the hook, to free up some space for a screw-head or a wire. I use metal sculpting tools for this purpose.
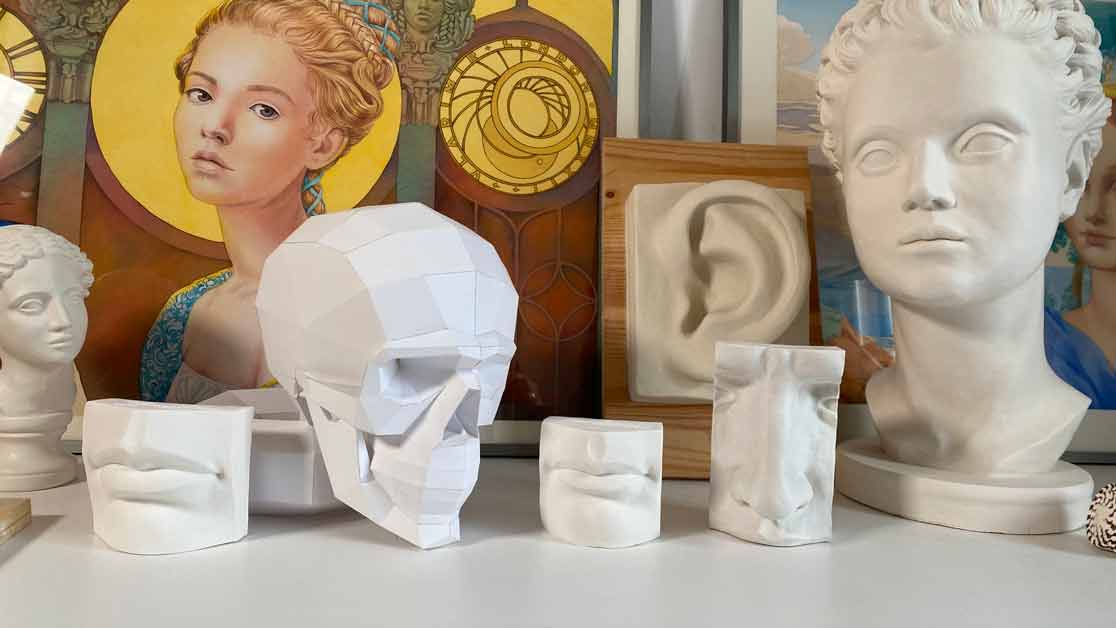
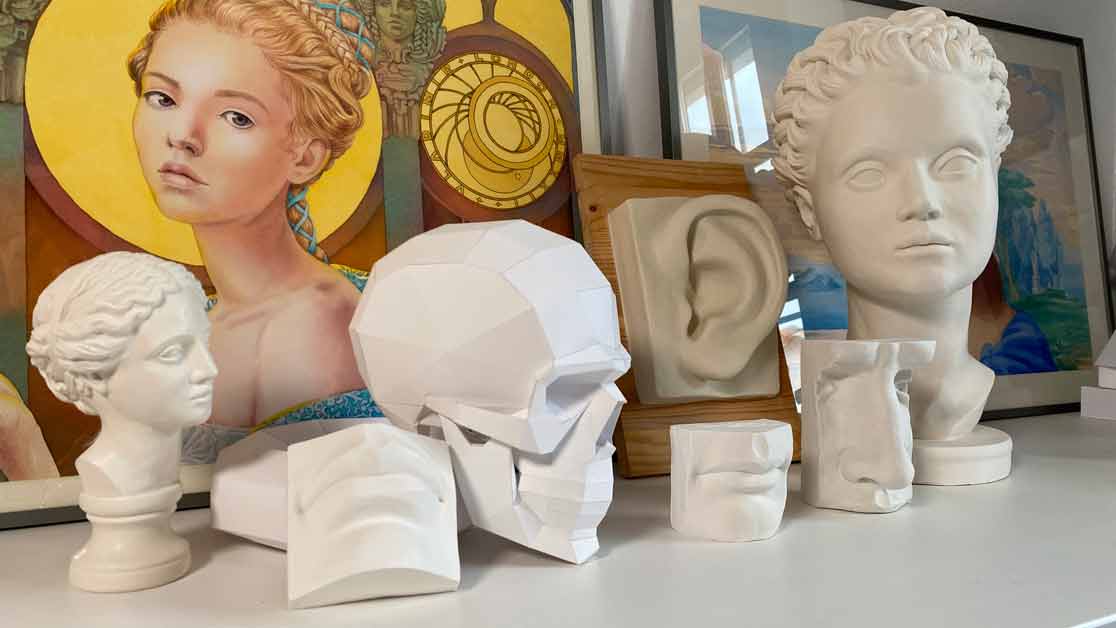
Let it dry for at least overnight or better several days before releasing the cast model. This model is very hard by now, so I could take off the masking tape, and disassemble the hard mold. Now, you could appreciate why two pieces of hard mold are better than one. It is easier to take them apart that way. The silicone mold did not have any release agent, but because it is soft and silky, it comes off the cast model easily. I'm very pleased with this cast sculpture. It holds all minute details of the original plastiline model, including my signature and date. The surface is smooth and hard. When it completely dries, it will be even whiter. It is a nice addition to my collection of sculptures. Here are just some of them.
To learn good drawing techniques, enroll in the Life Drawing Academy course:
Online Course
A self-study, self-paced course for you to learn fundamental methods of classical drawing and improve life drawing skills by watching video lessons and doing assignments
- Unlimited access to 52 life drawing video lessons
- Lifetime membership without deadlines
- Unlimited support from the Academy tutors
- Constructive critique of your artworks
- Member access to the Academy's Art community
- Place in the Academy's Students Gallery
- Exclusive members-only newsletter and bonuses
- Life Drawing Academy Diploma of Excellence in your name
One-time payment - Lifetime membership
$297 USD
Personal Tutoring Online + Online Course
The ultimate choice if you who would like to receive personal, one-to-one tutoring from the Academy teachers, which is custom-tailored to your skills and needs
- Everything in Online Course, plus:
- Dedicated team of art tutors
- Assessment of your current level of drawing skills
- Personalized curriculum tailored to your skills and goals
- Up to 100 drawing tasks with by-task assessment
- Unlimited one-to-one personal coaching with detailed per-task instructions and feedback
- Artwork critiques and results-oriented guidance
One-time payment - Lifetime membership
$997 USD


