Learn how to sculpt facial features
Enroll in the Life Drawing Academy now!
How to Sculpt a Nose

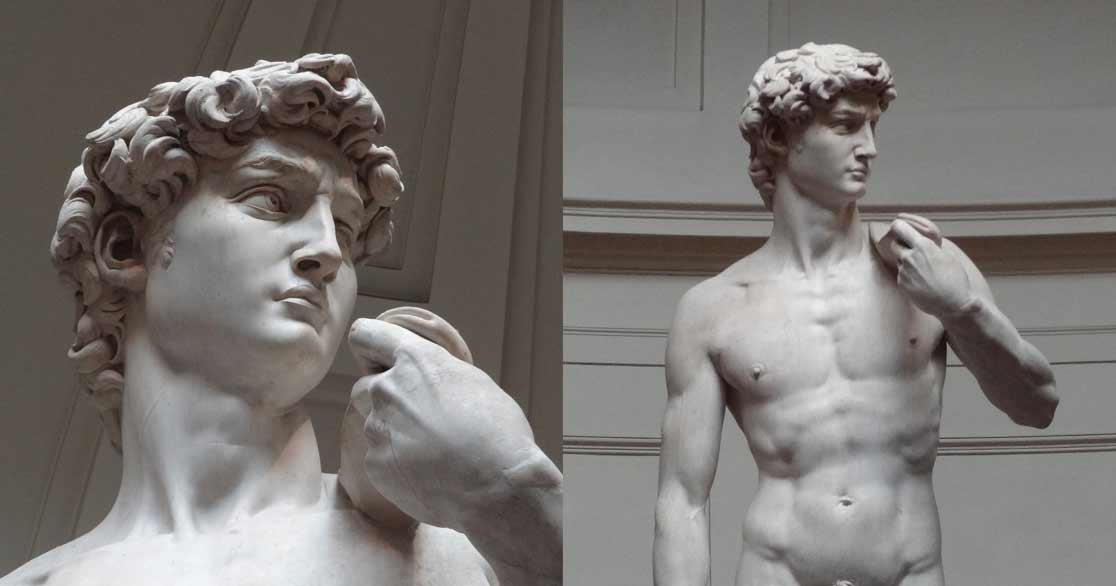
You may wonder how to learn to draw portraits if you don't have classical sculptures nor models to draw from life. In this video, I will show you how to sculpt a realistic nose that you can use as a model for drawing. This sculpture is based on the nose of David, that Michelangelo Buonarroti carved in marble more than 500 years ago.
I created a special paper template for the students of Life Drawing Academy Correspondence Course. This template is unique and not available anywhere else. This template comes with easy to follow instructions and consists of the Footprint and Profile outlines as well as 15 contours of a nose that follows the original sculpture by Michelangelo with high precision.
This template should be printed out on some heavy paper, A4 in size and at least 180 gsm weight. Usual office paper is not suitable for this purpose as it won't hold its shape. You need to use a very sharp scalpel and a metal ruler for cutting. Needless to say, a cutting mat is also required.
The Footprint template is a simple rectangle that outlines the width and height dimensions of the sculpture. This Footprint should be fixed to some board. Make sure the board is sturdy enough to hold clay without flexing. Half-an-inch or thicker wooden boards are good for this purpose.
For sculpting, I will be using Plastiline oil-based non-drying clay. This tube holds 5 kilos of clay. This particular clay is marked 70, which is "Very hard". If you have never used such clay before, you may find it difficult to sculpt with. And to answer your question, no, it is not my favorite kind of clay, but I would like not only to make a clay model, but also cold cast it. That is why high hardness is needed. You may notice how hard this clay is as I have difficulties cutting it. It is over 30 degrees Celsius in my studio, but it is not warm enough for this clay to be flexible. That is why I will be using a heating mat, which is turned to 45 degrees. Pieces of clay are placed on this mat and it will take some time for them to become a bit softer.
When this Plastiline warms up, it is softer and easier to work with. Nevertheless, it is not sticky enough even when it's soft. I have to press hard every small piece of Plastiline to sculpt a uniform mass. This is the main downside of this clay. Anyway, with many years of sculpting experience, I will manage this task even if I should sculpt a nose using a piece of cheese.
The plinth should be about 18 millimeters thick. I can check its evenness and thickness with the paper template. It is important to keep this plinth within the Footprint boundaries because otherwise it would be difficult to work with 15 contour templates.
The first contour is called "Profile". I need to cut it out. All templates should be cut out with utmost precision because even small deviations in one millimeter might give distortion of proportions. Once again, a good job can only be done with good tools. Make sure that your scalpel blade is brand new to get a clean cut.
On the "Footprint", there are two marks where the "Profile" template should go. If you sculpted the plinth with precision, the paper template should fit perfectly well. I use small pieces of clay to keep the template in place upright.
The next step is to sculpt a thin ridge in the middle that fits the "Profile" outline. One centimeter thickness is enough to hold its shape. Using the paper template takes off all guessing. All you need to do is to follow the template outlines with precision. Build up this ridge little by little. Stick all pieces of clay nicely and firmly because this ridge will be the main guide for his sculpture. Plastiline is warmed up to about 40 degrees, but you may notice that it takes some effort to avoid crumbling.
When the ridge is ready, make 13 notches along dashed lines. These indentations will help you to position each paper contour with precision. So far, the sculpting job is more mechanical rather than creative. Even if you have never sculpted before, such a template will help you to make a realistically looking sculpture. All proportions are embedded into this template and all you need is to follow the contours.
There are 15 outlines of a nose. I will cut them out one by one. Once again, make sure your scalpel is sharp because you do not want to struggle with materials. Also, it is very important to keep your fingers off the cutting line.
When the first contour is ready, I fix it with small pieces of clay to the Footprint. The next step is very simple; I just fill in with clay the space between the central ridge and the paper outline. It might be tempting to use big chunks of clay for sculpting, but the professional way of doing it is to use small pieces. This way, you have a better control on the process and also can compress clay with higher precision. The aim of this exercise is to follow exact outlines of the paper template. Even one millimeter gap is too big a deviation in this case. Also, make sure that not only the curved outlines, but also the outer surface of this sculpture is smooth and precise.
The next template is number Two. Put it in place to check whether the first layer of clay follows the template outlines. There might be some small gaps, which you need to fill in with clay.
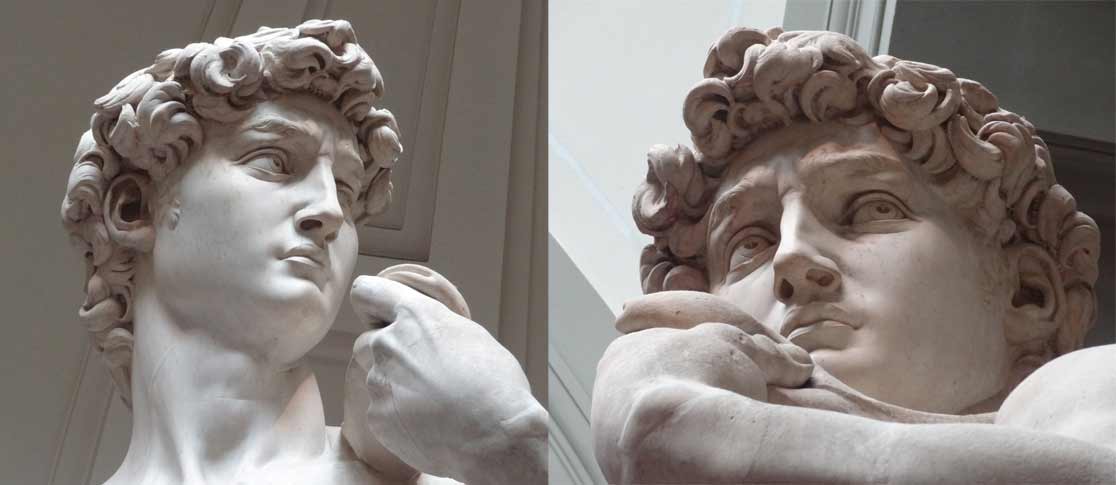
The Third outline differs in shape; so, every next one will do. I stick it to the board and continue adding pieces of clay little by little to fill the space up to the paper edge. I guess you already have figured out the process. The nose sculpture will be done layer by layer, contour after contour. The central ridge will be the highest surface of the nose along its central line of symmetry. The templates from one to 15 will serve as guides of the horizontal contours of a nose. Because this template closely follows the actual proportions of the classical sculpture, the end result will be realistic and proportionate, should you follow the guides. There is no guessing how high or low every place of this sculpture should be, the paper template will give you dimensions with necessary precision. The only bits you may find challenging are places between paper templates. In some places, bridging such gaps is straight-forward. However, it would help if you check reference photos of David's nose at various angles. I have seen the original sculpture of David in Florence several times, and every time was amazed with exceptional skills Michelangelo had. He started carving this enormous marble statue, that proudly stands more than 5 meters high, when he was only 26. It took him three years to complete this masterpiece.
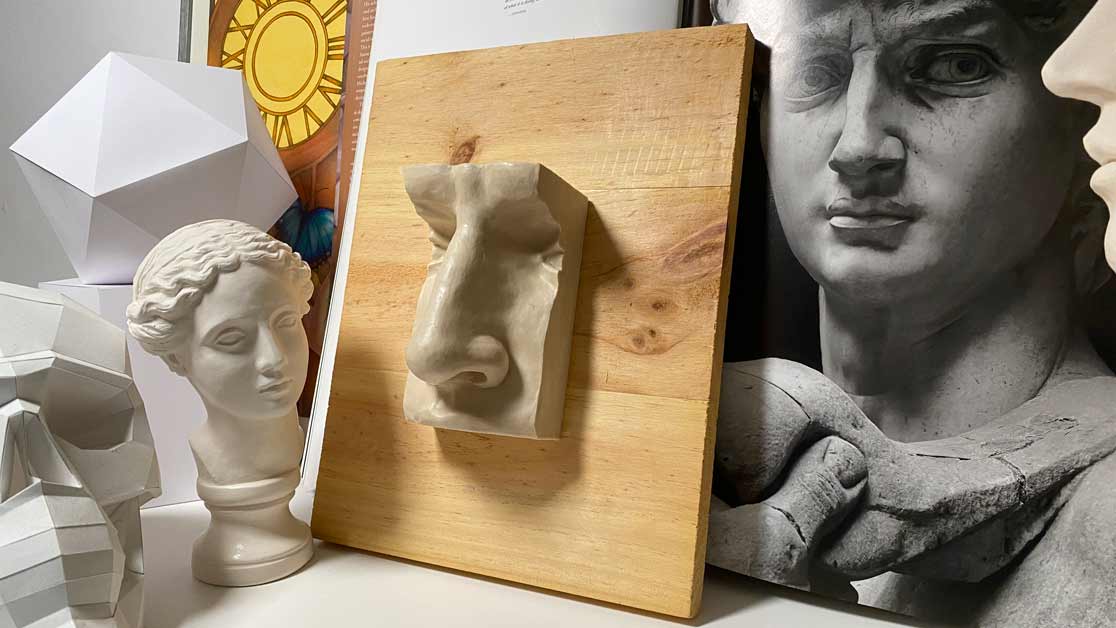
Let's come back to this nose model. When I finish it, you will see how realistic it is. All the proportions and anatomy will follow the original sculpture and I truly believe that there is no better way of learning the classical art than recreating it by yourself. Making copies of classical sculptures and busts will not only give you good sculpting skills, but also good taste in traditional art. In addition, such sculptures can be used as models for drawing figures, portraits and facial features. For example, the purpose of this task is to make a model of a nose that you will be closely familiar with. Not only would you know all the planes and shapes of every surface, but you will also get a very good understanding of its three-dimensional nature. Sketching from life is the best way to learn drawing skills. Needless to say, this sculpted nose will be a very patient model. You can draw it from any point of view and it will keep its pose for as long as you need it. I also would like to add that before sculpting this model, it would help to watch a dedicated video lesson on how to draw a nose from the Life Drawing Academy Online Course. In this video, you will learn the anatomical construction of a human nose as well as its planes and volumes. You will also find out constructional features of a nose you should need to keep in mind when sculpting and drawing a nose.
If you are serious about getting strong drawing skills, there is one program you do not want to miss out – the Life Drawing Academy Correspondence Course. In this course, you will get a dedicated personal art teacher, who will guide you step by step, task by task, until you reach the advanced level of drawing skills. Before you get the first drawing task, your current drawing skills will be thoroughly assessed, and academy tutors will propose an individual drawing curriculum that is designed to your level of skills. If you are a complete beginner, your curriculum will cover all the basic things that you need to know including how to hold and use a pencil, how to make proficient pencil strokes, how to measure proportions, how to draw in perspective, constructive drawing principles, rules of composition, anatomy for artists, figure and portrait drawing, and so on. If you are an advanced artist, your curriculum will skip the things you already know and will be focused on the topics you would like to learn and improve. Such topics could include how to depict emotions in portraits, how to make multi-figure compositions, how to express thoughts and ideas through your art. You might be interested in character design, story illustration, drawing animals or cityscapes; whatever your passion, it will be included into your personal curriculum. This art course is truly unique not only because it is suited for artists of all levels, but also because you will get hands-on, one-to-one tutoring that is tailored to your personal creative interests and needs. No art college would ever offer you the same service. Also, no art college would give you unlimited personal tutoring for a one-time low fee. The Life Drawing Academy Correspondence Course is one of the best drawing courses available today on the Internet.
The nose model is coming along nicely. There are only three contour templates left to complete the rough construction. I will cut out these templates one by one. As you may notice, I do not smooth out all the surfaces. The main task for now is to build up the model's three-dimensional construction. Big masses are more important than small details at this step. When all the outlines are filled in with clay, we could continue to fine-tune details.
There is only one template left – number 15. Its contour outlines the face approximately at the middle of the upper lip. I will add the remaining layer of clay, making sure that its side is perfectly flat.
You may wonder if using some paper template is necessary. The answer – it is not; you can sculpt a nose model freehand without any templates if you have some previous experience in sculpting. The beauty of this template is that even a complete beginner can make a sculpture of a nose that looks realistic, symmetrical, proportionate and has correct anatomy. The purpose of this exercise is not to become a professional sculptor, but to make a very good model for drawing from life. Of course, if you are interested in sculpting, I would strongly advise you to repeat the same sculpture, only at a different scale and without a template. This way, you will not only learn proportions and construction of a nose, but also would work on your measuring and sculpting skills.
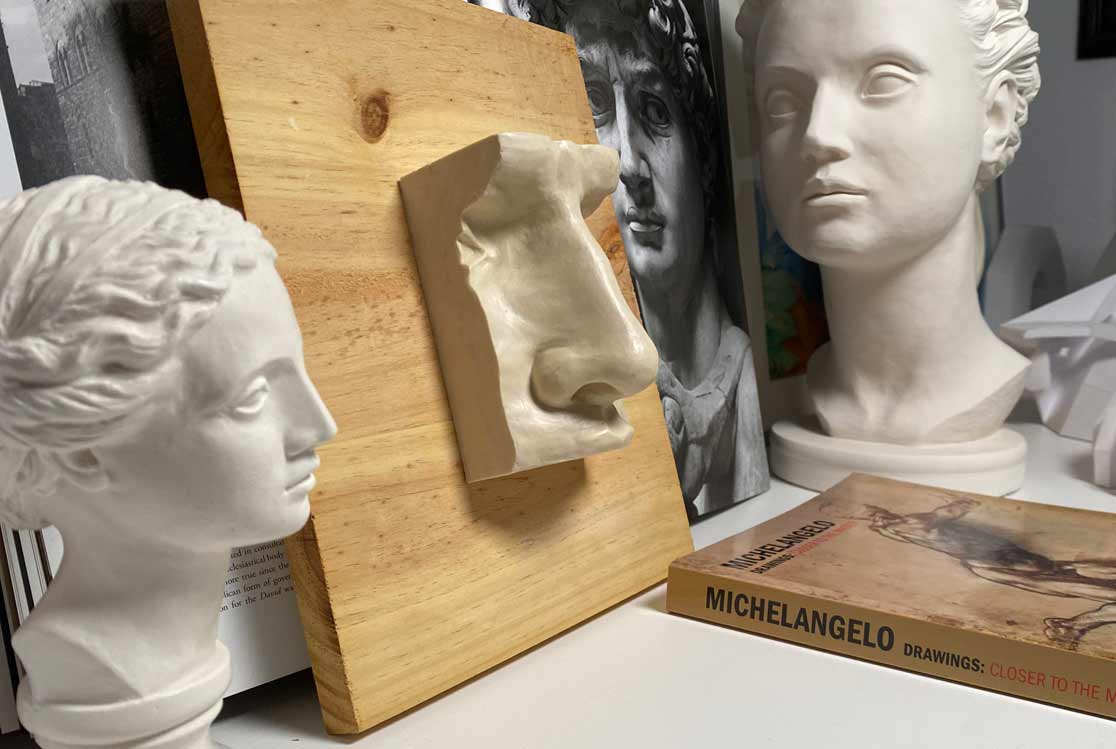
When all the volumes are in place, it's time to fix up all irregularities and smooth out the surface. This is when reference photos of David's nose will help. Check your sculpture from various points of view, make sure it is symmetrical and add or remove small bits of clay as needed. This is when your personal judgment of shapes and features becomes indispensable. Also, it is perfectly possible to change some features and adjust shapes as you want according to your creative task. Polish up the surface, so it looks finished and presentable. Later on, I will make a cold cast of this nose sculpture, but it is a different topic for another video.
This clay sculpture is complete and it's time to remove the "Footprint" template. If you are interested in the nose paper template it Is only available free of charge to the Life Drawing Academy Correspondence Course students.
To learn good drawing techniques, enroll in the Life Drawing Academy course:
Online Course
A self-study, self-paced course for you to learn fundamental methods of classical drawing and improve life drawing skills by watching video lessons and doing assignments
- Unlimited access to 52 life drawing video lessons
- Lifetime membership without deadlines
- Unlimited support from the Academy tutors
- Constructive critique of your artworks
- Member access to the Academy's Art community
- Place in the Academy's Students Gallery
- Exclusive members-only newsletter and bonuses
- Life Drawing Academy Diploma of Excellence in your name
One-time payment - Lifetime membership
$297 USD
Personal Tutoring Online + Online Course
The ultimate choice if you who would like to receive personal, one-to-one tutoring from the Academy teachers, which is custom-tailored to your skills and needs
- Everything in Online Course, plus:
- Dedicated team of art tutors
- Assessment of your current level of drawing skills
- Personalized curriculum tailored to your skills and goals
- Up to 100 drawing tasks with by-task assessment
- Unlimited one-to-one personal coaching with detailed per-task instructions and feedback
- Artwork critiques and results-oriented guidance
One-time payment - Lifetime membership
$997 USD


