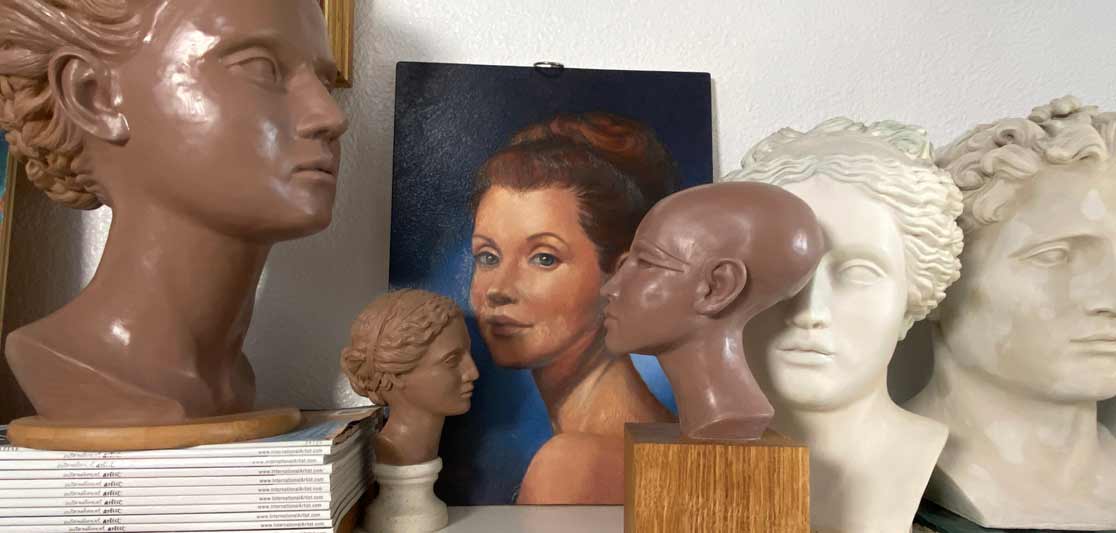
How to Sculpt a Head of the Princess
Video by Vladimir London
Enroll in the Life Drawing Academy now!
How to Sculpt a Head of the Princess
In this video, I will show you the complete process of making a small sculpture – a head of the princess. Here's her profile cut out with a scalpel. It has a very interesting shape of which I will tell you a bit later.
I used a wooden support to put some plaster on top. So far, the head has a very approximate shape. The most important thing is that this plaster has to be within the boundaries of the profile. You can see that a small margin left all around the head.
Because I will continue sculpting in oil-based clay, I need to protect it from plaster. For this purpose, I will apply a thin coat of PVA glue on top of plaster. I will spread this coat of glue with a brush. You may wonder why I wouldn't sculpt the entire head in clay. The answer is simple – plaster is hard, cheap and easy to shape. It will serve as a very good support for clay. However, because clay contains oil, dry plaster will absorb oil from clay and make it brittle with time. I want to keep this original sculpture and therefore need to protect clay from plaster. Here it is – the plaster head is covered with glue, which is dry by now. The surface is tough and shiny.
Now I need to mark the central line of the head. This is done in graphite pencil. This line will serve as a guide for the paper template. This template is made from thick 180 gsm paper. It is sturdy enough for the job. To hold paper in place, I will stick several pieces of clay along the central line. This clay is about 10 times more expensive than plaster, so using plaster for sculpting makes sense from this point of view as well. I will close the gap between plaster and paper outline with clay along the entire central line. You can also note that the wooden cube is covered with white paper. This is to protect clean wood from plaster and dirt.
Here's the Hard Monster Clay I will be using for sculpting. It is sulfur free, which is very important because I will make silicone mold for casting later on. Even a small amount of sulfur will prevent silicone from drying and the whole sculpture can be spoiled with never hardening silicone.
Now, I will add small bits of clay to build up the head volume. Here's the hand-made metal tool that I received as a gift from a professional and famous sculptor – Viktor Kosenko, who lives and works in Riga, Latvia. This tool is very ergonomic and pleasant to work with. Thank you very much, Viktor! I really appreciate it.
This type of clay is hard. At the same time, it holds every tiny detail and I find it indispensable for small sculptures like this one. Because plaster is covered with glue, which gives a hard film, clay sticks to the surface nicely.
Here we go, one half of the head is covered with clay and so far, it has a very rough surface. The aim for this step is simply to cover the entire plaster head with clay. I will continue with another side.
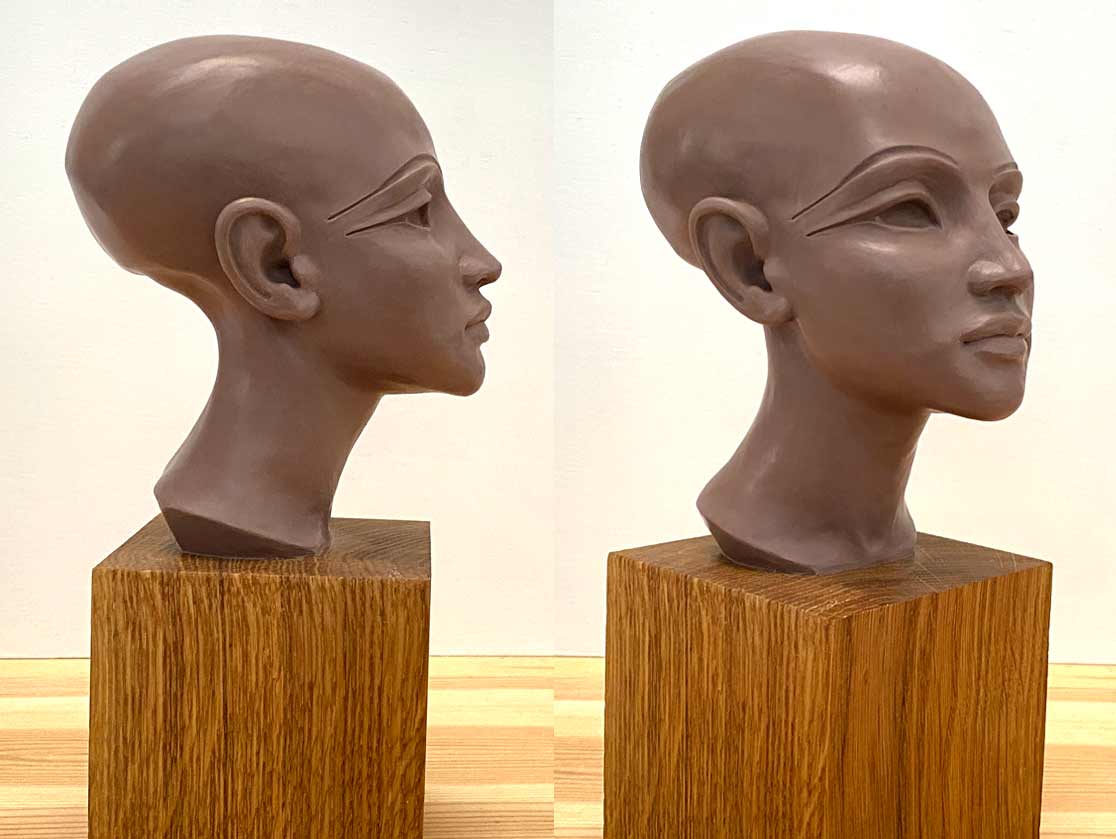
While I'm sculpting, I will tell you a few words about this project. Not so long ago, I traveled to Berlin to visit several art museums. In one museum, I was very much impressed with an ancient head of the princess, made of brown stone. I liked that portrait so much that I decided to make a similar style sculpture placed on a cube. The model for this sculpture is a young princess, the daughter of Akhenaten and Nefertiti, who were the rulers of Egypt more than 1300 years BC. The pharaoh Akhenaten had six daughters with Nefertiti; this will be a portrait of one of them. Nefertiti is known not only as an Egyptian Queen, but also for her beauty. Her name means "the beautiful one has come". So, I have to make a portrait of her daughter to be not just stylish, but attractive as well. In case you wonder why this head has such a strange shape, this was a fashion at that time for ruling families. A pharaoh had to be different from common people and this difference was cultivated and shaped in many ways. One of the features was a deformed skull. When a child was born into a pharaoh's family, the child's head was bandaged in such a way that the skull grew to the back of the head, so by adulthood, the pharaoh's head was very much different from everyone else. We can see such skulls in mummies, as well as in ancient sculptures and murals.
After removing the paper template, the excess clay can be cut off with a sharp palette knife. Because this clay is not sticky, it is not only good for sculpting, but also for cutting.
One half of the head is gradually taking shape. I will now take care of the second half and add the facial features. The nose, mouth and eyes are in place; but the head would not be complete without ears. How to sculpt ears, nose, mouth and eyes is demonstrated in the dedicated video lessons. You can find those videos here -Life Drawing Academy is about how to draw portraits and figures. Its Online Course comes with 52 video lessons, lifetime membership and unlimited reviews of your works of art. In the Correspondence Course, there are many more topics covered in depth, including sculpting. This course comes with unlimited one-to-one personal tutoring; it is the best correspondence course available today on the Internet.
Here we are, the head is complete with the facial features and also has stylised eyebrows. I will polish the surface now. The reason why eyes and eyebrows are recessed is because the ancient sculptors decorated heads with inlay eyes, making eyes and eyebrows with different color stones. For this sculpture, I will leave it as is. It is complete and signed with my name.
I can now remove protective paper. It served its purpose. The wooden cube is treated with ganosis, which is hot beeswax mixed with colophony and linseed oil. This treatment will protect wood from humidity. Here is the finished sculpture in clay. It is polished and looks good. Because it is made of oil-based waxy clay, it will never harden. To get durable copies, I will prepare a mold for casting.
Casting is optional, but I would like to have more than one sculpture to give them away as presents to my friends and relatives. So, let's prepare this model for mold making. To begin with, I will protect the wooden surface with the brush-on release agent. It will prevent silicone from sticking to it. Only the top side of this cube will be in contact with silicone. I will cover this surface using a cheap synthetic brush. It is important for a release agent to be sulfur-free. Otherwise, it would prevent silicone drying. The clay sculpture also can be covered with such an agent, but because this particular clay is waxy and oil-based, silicone would not stick to it. It is another reason why I like this clay.
For the mold, I will use this kit, which comes in two parts, which should be mixed in equal amounts. It makes it easy to prepare. I will also need a plastic cup, a wooden mixing stick, silicone thickener, and paint. I will measure two parts of silicone by weight. Using scales will give higher precision than measuring by volume. For the first coat, I will mix 25 grams of each silicone part; 50 grams in total. The first part of silicone is clear. Now, I will add the second part, which is green. This is tin silicone, which means that it has low viscosity and can be poured. Because it is rather liquid, bubbles formed during mixing will flow up and pop. This will give a bubble-free mold. It is important to mix two parts together well, scraping the cup's sides and bottom. Otherwise, unmixed bits might never harden. I will mix this silicone for approximately five minutes and will fast-forward this repetitive process.
Although this kind of silicone is designed for pouring, I will apply it with the brush. A cheap synthetic brush is used for that purpose. I use a soft brush because I do not want it to scratch the not-hardened clay surface.
The first layer of silicone will be very thin. Its purpose is to cover all the area without any gaps and bubbles. At this step, it is more like painting a sculpture rather than making a mold. A thick coat of paint would flow down, so would this silicone. That is why I'm not trying to build up volume, but simply cover the entire head with a thin layer. It is a slow-drying silicone, so I have plenty of time to apply the coat. Here's the first layer of silicone. It is very thin and glossy. I will let it dry for several minutes. Now, it's time to prepare silicone for the second coat. This time, I will add the thickener to achieve higher viscosity. Three small drops of this thickener will be enough for this purpose. Once again, silicone has to be mixed thoroughly. It will take several minutes for the thickener to disperse and for this liquid to become thicker. Once again, I will brush on silicone with a soft synthetic brush. You can see that silicone is not liquid anymore and doesn't flow; it is more like a paste that stays in place where I put it with the brush. The second coat is noticeably thicker than the first one. The purpose of this layer is to add thickness to the mold. The first layer is touch-dry and I have to brush very carefully not to damage it.
After adding several more layers of thickened silicone, I also created this ridge. This is the place where two parts of hard mold will join.
Because all previous layers are green, it is hard to see which places are covered thinly and which are thicker. To solve this challenge, I will use silicone paint. I only have blue paint, which in hue is close to green, but it will do. Just a few drops of paint will change the appearance of this batch of silicone. I do not need it to be totally different in color, just different enough to spot it.
Here we go, now it is easier to see which areas are covered with blue silicone and which are to be treated. For every layer after the first one, I add the thickener to increase viscosity. So every coat is building up the thickness of this mold.
This sculpture has a simple symmetrical shape with no major undercuts. I need to make sure that eyes and ears have smooth surfaces with no indents.
To make this mold more rigid without using too much silicone, I add thicker bands across the head. These ridges will work as stiffeners.
Here's the complete soft mold. In thin places, it is only about four millimeters thick. Ridges are about 10 to twelve millimeters.
I will make four round holes in the corners. It is done with a metal tube, one end of which is sharpened. These holes will be the keys to hold the exposed soft mold in place. The soft mold is now fully prepared for making the hard one.
For the hard mold, I will use plaster bandages. Not to handle the roll with wet hands, I will pre-cut several pieces at once. I like working with small pieces because they are easy to moisten, fold and apply. The process of using plaster bandages is very simple. First, you need to wet one piece, dipping it very quickly into water. Then, let excess water drip down, this will take several seconds. After that, I fold the piece in half. This is done for two reasons - one piece will be thicker and also there will be twice more plaster per same area. When water no longer drips down, I place the piece on the sculpture. Because it is wet, it sticks to the glossy silicone surface well. The next bandage piece is prepared the same way. It is dipped into water, allowed to soak for several seconds while excess water drips down, and then folded in half. The moistened piece is placed next to the previous one, overlapping it at least half an inch. The overlapping area is now four layers of bandage thick. This is what will make this mold one unit. I will apply the same routine until one half of the head is fully covered. The third bandage piece overlaps the previous two. In the spot where all three pieces are joining, there are six layers of muslin cloth. This is thick enough to be rigid when dry. Because this sculpture is very small, I will apply only one layer of bandages folded in half. Overlapping areas will make this hard mold strong while thin.
However, there is a place where thickness is required. It is the joining edge between two parts of the hard mold. I will apply the second layer of plaster bandages to make it thicker. These pieces are also folded in half, but at the edge, additional folding is required.
So, here it is - a nicely formed one-half of the hard mold with a thicker joining edge. I will let it dry overnight.
Before making the second part of the mold, I need to apply some release agent on the edge, so two pieces would not stick together for good. Vaseline can be used for that purpose. I apply it with the brush. This step is important. Without it, you may spoil the entire mold. The reason why two molds are needed is because the silicone mold is soft and would not hold its shape without some hard casing.
I already pre-cut several pieces of plaster bandage and can start making the second half of the hard mold straight away. While I'm making it, I will share with you a few tips you may find helpful. Begin the hard mold from the joining edge. This is the most critical part of the structure. Depending on the sculpture size and shape, you may want to make this edge not straight, but zigzagged at several points.
This will allow two pieces of hard mold to join each other with higher precision. At the edge of one half of the hard mold, you may want to add several special keys, which will help to lock two parts together. Such keys are just small pieces of plaster that slightly overlap another half. For such a small sculpture, four to five keys will be enough.
If you are making a big mold, change the water regularly. Water saturated with gypsum somehow reduces the hardness of plaster.
Another good tip you may want to use is keeping a paper towel at hand. You may need to absorb excess water or simply wipe your fingers from time to time. Also, because plaster will irritate skin, you may want to use gloves. Alternatively, you may rub your fingers with vaseline; it won't totally prevent contact of gypsum with skin, but will reduce irritation and make cleaning hands easier. Also, you may rinse and towel-dry your fingers after applying each piece of plaster bandage. Working with clean hands is more pleasant, not to mention skin irritation.
The second half of the hard mold is done by now. I can now remove the plastic film, which was protecting the wooden cube from plaster and water. It's time to separate two pieces of mold. Should you apply enough release agent, this should not be a problem. It is also important to have no undercuts that would prevent separation. The hard mold comes off nicely without any difficulties. As you can see, it is very thin, yet it is sturdy enough to keep the shape and provide support. Two halves of the hard mold are locking together tight and with high precision. There are no gaps between.
To take off the soft mold, I need to cut it through at the back-side of this sculpture. It is done with a very sharp scalpel, which penetrates into waxy clay.
The size, location and shape of this cut are important. It should be no bigger than necessary and cut through the thick ridge. Also, it is not straight, but wavy. Such a shape will help to join the cut inside the hard mold with higher precision.
As I mentioned before, silicone would not stick to the waxy oil-based clay. It comes off the sculpture nicely. Taking off the soft mold requires extra care not to damage it. I also want to keep the original sculpture intact. The intricate places are ears and eyes because they have undercuts. I need to be careful removing silicone from these places.
The original sculpture is not damaged, which is very good. The soft mold is in one piece with the wavy cut joining well. I can now place the soft mold inside the hard one. The small holes in silicone are joined with the hard plaster pins. Such interlocking will keep two molds together without any movement between. You may notice small plaster keys along the hard mold edge. These keys lock two pieces of plaster casing together. With the outer shell locked, there is no gap where silicone was cut.
The cut damage to clay sculpture is minimal. It can be fixed and polished. I am quite pleased with the results so far. The soft and hard mold are done and the original sculpture is in one piece.
To keep two pieces of hard casing together, I will use some masking tape. For the same purpose, you can use some wire, string, or clinging film. Because this sculpture is small, masking tape will do. The advantage of masking tape is that it would not untie and get loose during rotational casting, which will take about 25-30 minutes. During that time I would need to concentrate on rotation, not on holding two pieces together. The mold is securely joined and will take as much handling as needed.
Another thing that I need is a water-tight lid. I will make it from a wooden board and aluminum kitchen foil. A piece of flat plastic or metal would be suited for this purpose, but I will improvise with materials I have. Such a lid has to be totally flat and sturdy. Its surface has to cling to the base of the soft mold without any gaps to prevent leakage. Some sculptors prefer working without such lids, to see what is happening inside the mold. For a bigger size sculpture, I would also use no lid, but for this one, it will be much easier to cast inside the closed mold. Here's the simplest lid I could make with materials available. There is one more thing I need to do before casting. This lid has to be treated with some release agent. Vaseline would do the job nicely. A very thin coat of petroleum jelly will be sufficient for this purpose.
To hold the mold vertically upside-down, I will use a bowl and towel. For bigger sculptures, you want to use some bucket with sand. But for such a small piece, a bowl would be enough. As long as the mold stands upright, I don't need anything more fancy.
Here's a flexible rubber bucket, which I will use for plaster mixing. It is easy to clean when left-over plaster dries. I also need scales for measuring the plaster-to-water ratio.
For casting, I will use Fill Ceramic from Reschimica. It is a water-miscible powder that dries very hard and white. It has 7 minutes of working time and will dry in about half an hour.
First, I will measure the needed quantity of powder. I do not need much because the thickness of this cast will be just a few millimeters. Fil ceramic is much harder than conventional gypsum and even a thin shell will be strong enough. The next step is adding brown pigment. This powder is very staining; even a small amount of pigment would give a rich brown color.
When dry pigment is mixed with white plaster, it becomes much paler. The full color will become apparent only when this powder is wet. Pigment can be added into wet plaster, but I prefer to put it beforehand because this gives more time for thorough mixing. It is a good idea to make some small samples to test tinting properties of pigment. Measure weight with precision and write down on such samples its recipe.
The right way is to add plaster to water. But because this sculpture is small, I will break this convention and add water to powder. I know that in five minutes, I will manage to intermix this plaster properly. The amount of water is measured by weight. The ratio is 10 parts of powder to 3 parts of water. So, for 200 grams of plaster I need 60 grams of water. You can see how pigment colors this mix. This brown color is strong, exactly what I needed. It will take five to six minutes to intermix this amount of Fil ceramic. Preferably, it should be done with some mechanical mixer, but I'm confident that will do it well manually. I will fast forward this step. Another thing that I want to try is adding copper powder into this mix. It might spoil the appearance and this sculpture would look like a Christmas tree decoration, but I want to test it anyway. Who knows, I might get an interesting effect. Most of the metal powder will be inside the ceramic layer, but some particles will glitter on the surface. We will see how it looks later.
I have to make sure that everything is mixed properly, with mo lumps of powder or pigment left.
Now is the critical step - casting. The mixed powder should be poured in carefully, into one spot on the bottom of the mold. This is to prevent trapping air bubbles in random places. I will use a palette knife for scraping plaster from the bucket's walls.
The lid goes on top. It is secured with four bulldog clips at all corners.
Now, without any delay, I have to shake and rotate the mold so the plaster is forced into every cavity and squeezes out trapped air from the surface. The tip here is not just shake, but push liquid plaster with inertia into every square centimeter of the sculpture surface. The most difficult places are eyes, nostrils and ears, where air could be trapped. Extra care should be taken in these areas. While shaking, I also rotate the mold in all directions. Because the lid is closed, I could not see inside. I have to imagine how plaster forms the walls of this sculpture inside the mold. Some experience is required here; and, yes, I have done it before. With my hands, I feel how liquid is distributed inside, how viscous it is and where it flows. I also feel how mass distributes inside the mold. No part of this sculpture should be heavier than other; this will ensure that walls have equal thickness.
I will now continue rotating the mold without shaking it because plaster begins to set. Shaking may damage the walls. All I need at this step is equal distribution of Fill ceramic mass to achieve equal thickness in all places. This includes the bottom part as well.
Although this plaster hardens in 30 minutes, I will leave it overnight.
It is fully dry and very hard by now. It's time to take off the lid. I immediately see that copper powder is shining and I'm not sure whether I like it or not. Let's remove the masking tape to open the mold. The hard case separates with ease. There is no leakage of plaster, which is very good. This proves that the soft and hard mold were done perfectly well. Now, the exciting bit - how does the sculpture look? The copper powder glitters in places, but the deep brown color is very good. Also, there are no major faults; it was casted nicely. I am quite pleased with the result. And the good thing is, I can make as many sculptures as I want in any color I like. Here's another brown sculpture without any glitter.
To learn more how to sculpt and cast portraits, take the Life Drawing Academy Course
Online Course
A self-study, self-paced course for you to learn fundamental methods of classical drawing and improve life drawing skills by watching video lessons and doing assignments
- Unlimited access to 52 life drawing video lessons
- Lifetime membership without deadlines
- Unlimited support from the Academy tutors
- Constructive critique of your artworks
- Member access to the Academy's Art community
- Place in the Academy's Students Gallery
- Exclusive members-only newsletter and bonuses
- Life Drawing Academy Diploma of Excellence in your name
One-time payment - Lifetime membership
$297 USD
Personal Tutoring Online + Online Course
The ultimate choice if you who would like to receive personal, one-to-one tutoring from the Academy teachers, which is custom-tailored to your skills and needs
- Everything in Online Course, plus:
- Dedicated team of art tutors
- Assessment of your current level of drawing skills
- Personalized curriculum tailored to your skills and goals
- Up to 100 drawing tasks with by-task assessment
- Unlimited one-to-one personal coaching with detailed per-task instructions and feedback
- Artwork critiques and results-oriented guidance
One-time payment - Lifetime membership
$997 USD


