How to Sketch a Skull
Enroll in the Life Drawing Academy now!
How to Sketch a Skull
To draw realistic portraits, an artist must know the anatomy of a human head, its construction and proportions. Good understanding of what lies beneath the skin gives great advantage in portrait drawing.
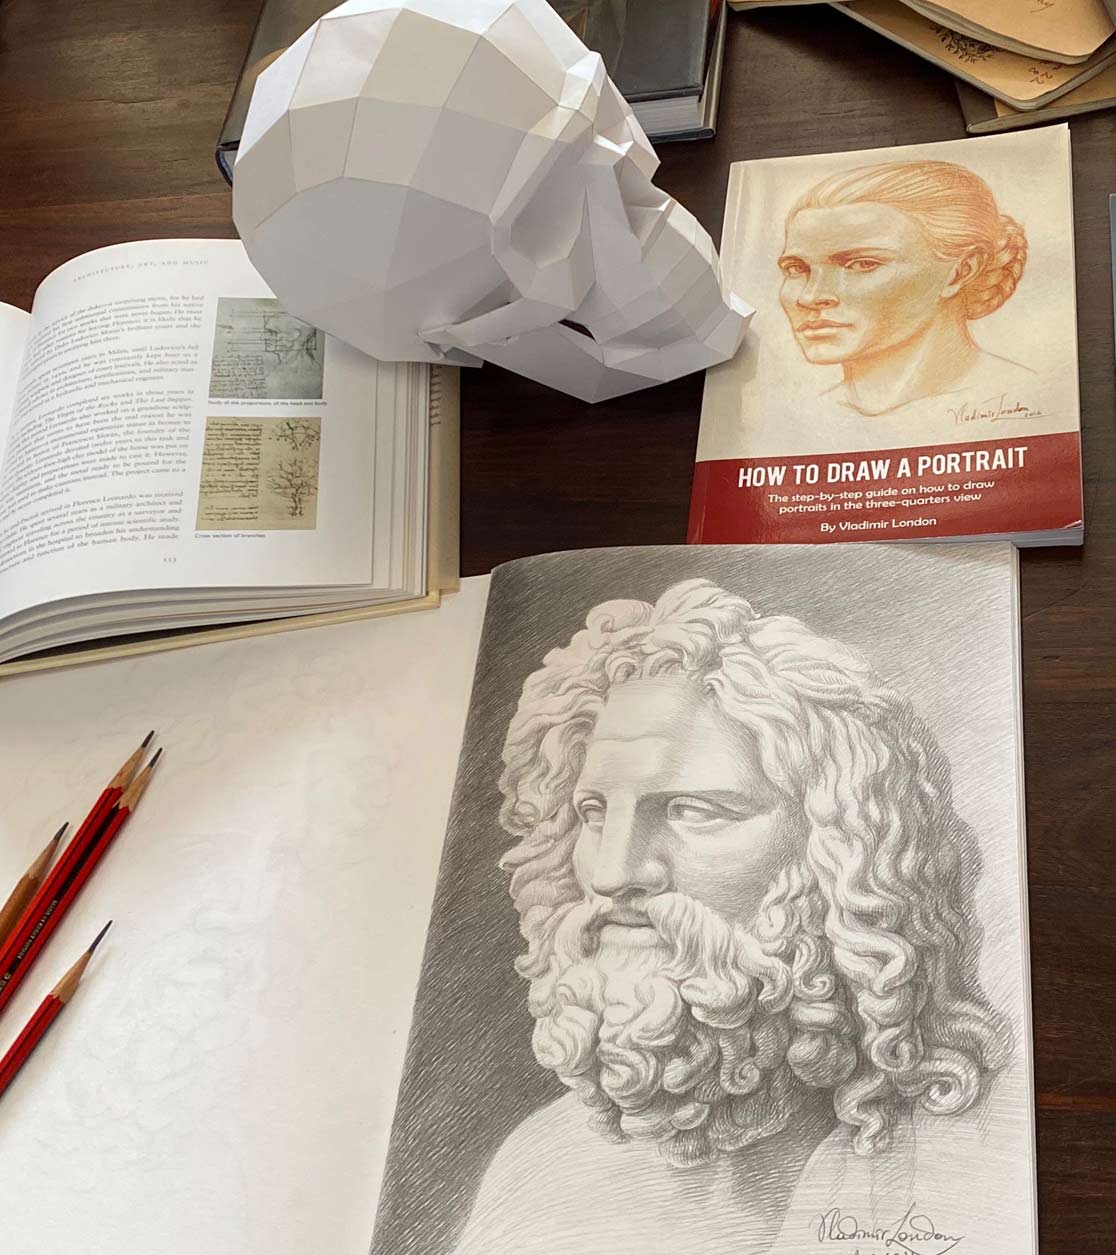
That is why, in this video, I will show you how to make fast sketches of a skull. These drawings are done in pen and ink. I used an A4 size sketchbook and a fountain pen with brown ink. For sketching, you can use whatever medium you like, it is not about style, but the knowledge of anatomy. I will draw all sketches from memory. Let's start with the first one. This sketch of a skull will be in the three-quarters view. The main purpose of making fast sketches of a skull is to fix in your memory what you already have learned about the skull's construction and proportions in previous lessons and tasks.
In the "How to Draw a Skull" lesson, I presented a unique way of drawing a well-proportioned skull in the full-face and profile views. The step-by-step sequence of drawing was necessary for achieving correct proportions and geometry. However, this task is different. Instead of following the rigid set of steps, now you have sufficient knowledge to make free-flowing sketches of a skull from different points of view.
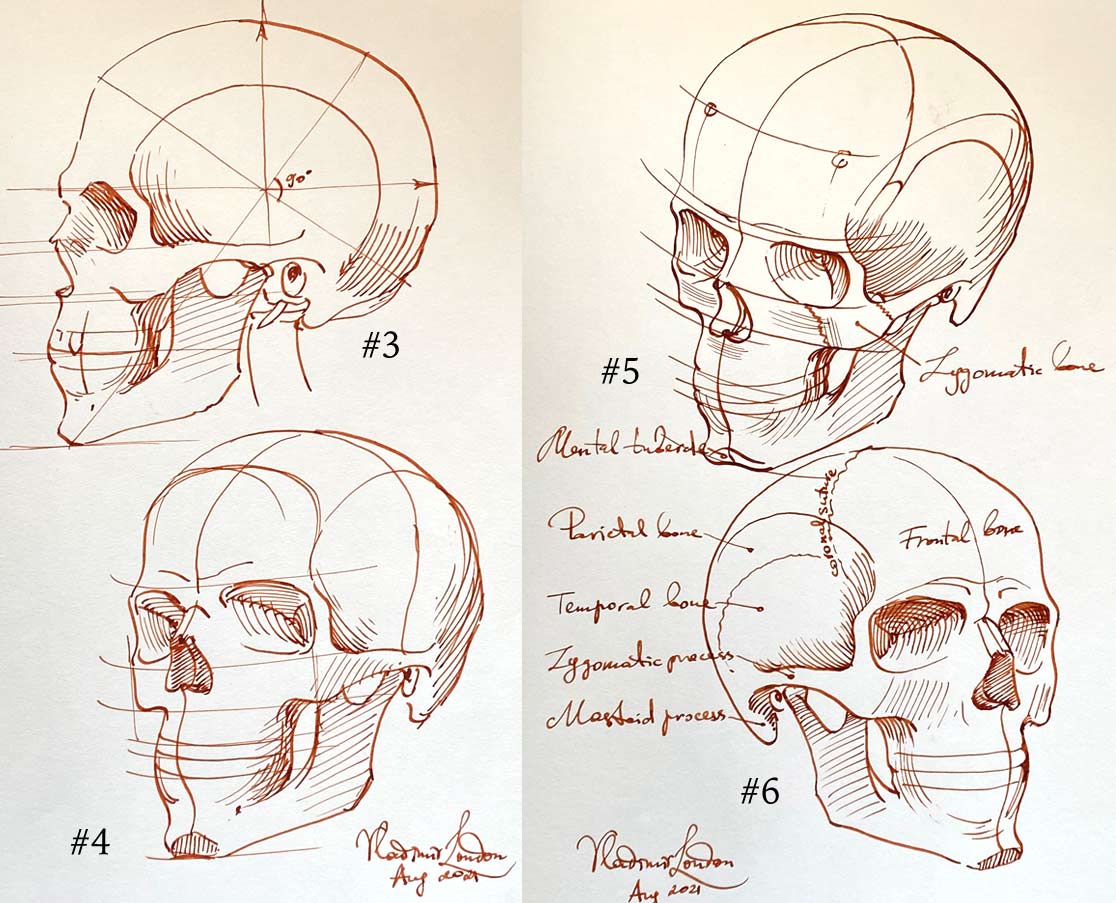
This time, it is not about measuring precise proportions on paper, but keeping those proportions in mind while you sketch. Of course, you can draw some helping virtual lines. One such line goes vertically. It is a central line of face symmetry. Also, there are horizontal levels of facial features. These guides will help you to plan your drawing and keep the main proportions in place. At the same time, you do not have to measure those virtual lines with a pencil. Instead, you need to learn how to judge proportions of a skull by eye. It doesn't matter if proportions will be a bit off. As long as you know those proportions, you can practice to improve your accuracy. This knowledge will help you to spot mistakes in your sketches. If you see mistakes, you can work on improving them. Without the necessary knowledge, it would be challenging. So, if you feel that you need to refresh what you know about the skull's construction and proportions, you may want to check the previous task video.
To spot mistakes and to make better drawings, you need to constantly ask a series of questions while you are sketching. For example, you may ask such questions as:
- Is this skull symmetrical?
- How about horizontal levels? Are both eyes placed on the same level?
- Are both cheekbones equal in size?
- How about the cranium? Is it big enough?
- What about perspective? Is it distorted or not?
The more questions you ask and answer, the higher your chances of making a better artwork. The purpose of this exercise is to make fast, disposable sketches. They are not meant to be well-executed pieces of art. As you can see, I'm drawing with a fountain pen. It doesn't mean that you have to use the same medium, but there are several reasons why you may want to draw in pen and ink as well. First of all, it is a "fast" medium. A full-strength line can be achieved in one stroke. It is dark, bold and well-defined. Secondly, drawing in pen and ink develops fine motor skills. Because ink lines are well-defined, this style is forcing you to draw with precision. That is why, you involuntary practice the skill of hand-eye coordination. Also, pen and ink is a "disciplined" medium. Because ink marks are not erasable, you have to take more care when placing them on paper. There is no luxury of making a mark, then changing your mind, erasing it and drawing over. Every line you draw will stay as is, so you are subconsciously forced to make better lines.
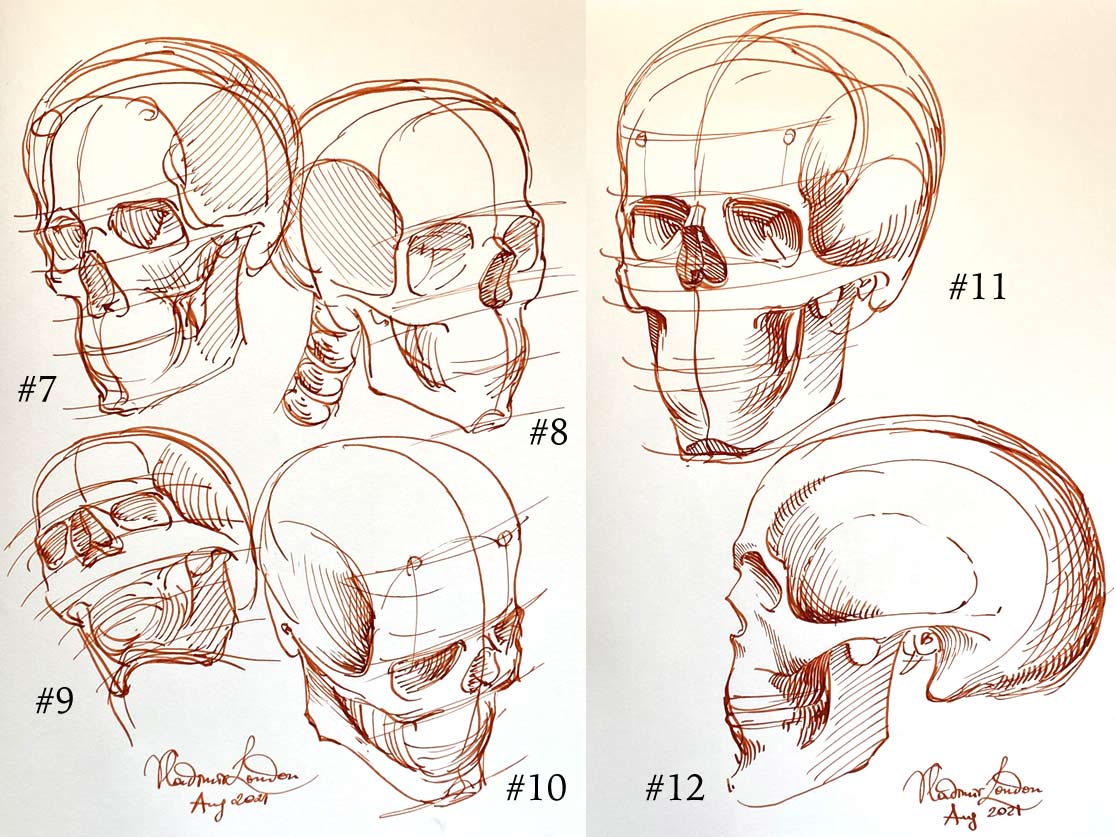
I keep making sketches of a skull in various views. It doesn't matter that those sketches are not the best drawings I can make. The aim is different. I'm working on quantity, not quality. These sketches are not for some art exhibition; they are disposable scribbles to practice fast sketching. Quantity inevitably will turn into quality. If you obsessively draw the same object again and again, with time, you will do it better and better. Because it is a numbers game, you want to play it faster. This is where the pen-and-ink medium really helps. In my experience, it is at least twice as fast to make a sketch in ink than in graphite pencil. This is because when drawing in graphite pencil, it is tempting to start with light and thin marks, then fine-tune them, erase and redraw, go bolder with more pressure on a pencil, and finally apply some shading in hatching. This sequence can be replaced with a single pen-stroke when drawing in ink.
Do not ask me what pen and ink I use. It is not about some particular kind of fountain pen or certain ink shade. It is about your skills. The anatomy of a human skull will be the same regardless of what pen you use. You can draw in any color, and the proportions of a skull will not change because of your color choice. So, it Is not important what drawing materials you use, but what you learn and how well you can draw what you know. When it comes to paper, it is also up to you, which kind of support to use. It happens that I draw in a sketchbook in this video, but with the same success, I could draw on separate sheets or a roll. It doesn't matter. There is one piece of advice, though. You may want to use A4 or A3 size of paper to make your sketches big enough. Two skull sketches fit comfortably on A4 size. Make them as big as the space allows.
Now, the fun part of this exercise. This video is not just a "watch me drawing demonstration" and instructions for Life Drawing Academy students. It is also a test on how well you know proportions and alignments of a human skull. By the end of this video, I will make 16 sketches of a full skull. In a half of them, I will intentionally make the same mistake. Your task is to spot it. Here's the hint - this mistake will be either very obvious, or I will add virtual guides to help you notice it. Here's another hint – the error in question is a distorted proportion, not the quality of contours or outlines.


Spotting mistakes is an important part of learning. There is nothing wrong in making mistakes in drawing; it is natural. As long as you see what needs to be fixed, you can work on improving your skills. The challenge begins when you do not know what is wrong with your drawings. Have you ever had such thoughts as "this drawing is a bit off, but I don't know what is wrong", or "this portrait is not realistic, but I don't know how to fix it", or "I don't know how to make this portrait appear more three-dimensional"? It is difficult to fix mistakes when you do not see them. Practice alone won't help; you need the know-how as well. They say that practice makes perfect. This is true. Practicing wrong drawing techniques would make you perfect at making the same mistakes again and again.
When drawing portraits, many self-taught artists make the same "system errors" in almost every artwork. Some common mistakes are:
- Placing the line of the eyes too high
- Drawing the cranium disproportionally small
- Placing the ears higher than needed
- Distorting the symmetry of the face
- Misaligning levels of paired facial features
- Drawing in reverse perspective, and so on
These errors occur not because an artist didn't practice portrait drawing, but because the necessary know-how is missing. For example, when you draw an ear, if you know that the ear is as high as the nose, you could check if this is the case in your drawing. If you know that the top edge of the ear is on the same level as eyebrows and its bottom edge coincides with the level of the base of a nose, it won't be challenging to check if your portrait follows those rules. However, if you do not know that the distance from the ear to the eyebrow is the same as the width of one eyebrow, how would you check this proportion when you draw from memory or imagination?
Here's the secret – professional artists draw what they know; amateurs copy what they see. This applies fully to anatomy.
So, to make well-proportioned realistic portraits, you need to know anatomy, proportions, and construction. This is what you can learn in the Life Drawing Academy video course.
However, understanding anatomy and proportions is not enough. You also need to have good constructive drawing skills. These skills include many topics, such as how to measure with a pencil, how to draw in perspective, how to deal with foreshortening, how to use constructive drawing principles, golden proportions and so on.
If you need to improve your constructive drawing skills, you can take the Life Drawing Academy Correspondence Course. In this course, you will receive personal, one-to-one tutoring from the Academy teachers. This tutoring is unlimited, provided for a lifetime and comes for a one-time low fee. This is one of the best drawing courses available today in the world.
To learn good drawing techniques, enroll in the Life Drawing Academy course:
Online Course
A self-study, self-paced course for you to learn fundamental methods of classical drawing and improve life drawing skills by watching video lessons and doing assignments
- Unlimited access to 52 life drawing video lessons
- Lifetime membership without deadlines
- Unlimited support from the Academy tutors
- Constructive critique of your artworks
- Member access to the Academy's Art community
- Place in the Academy's Students Gallery
- Exclusive members-only newsletter and bonuses
- Life Drawing Academy Diploma of Excellence in your name
One-time payment - Lifetime membership
$297 USD
Personal Tutoring Online + Online Course
The ultimate choice if you who would like to receive personal, one-to-one tutoring from the Academy teachers, which is custom-tailored to your skills and needs
- Everything in Online Course, plus:
- Dedicated team of art tutors
- Assessment of your current level of drawing skills
- Personalized curriculum tailored to your skills and goals
- Up to 100 drawing tasks with by-task assessment
- Unlimited one-to-one personal coaching with detailed per-task instructions and feedback
- Artwork critiques and results-oriented guidance
One-time payment - Lifetime membership
$997 USD


